
!["[New] 2024 Approved The Ultimate Guide to Popular TikTok Reactions"](https://www.lifewire.com/thmb/is_QRfsRnBQKZynxD2-d55bno7Q=/400x300/filters:no_upscale():max_bytes(150000):strip_icc()/Home-Theater-Receiver-vs-Stereo-Receiver-96bcb20d215048b9b6725209d36d5112.jpg)
"[New] 2024 Approved The Ultimate Guide to Popular TikTok Reactions"
The Ultimate Guide to Popular TikTok Reactions
Create High-Quality Video - Wondershare Filmora
An easy and powerful YouTube video editor
Numerous video and audio effects to choose from
Detailed tutorials are provided by the official channel
Are you a content creator looking for the next hot thing to post on TikTok? Look no further. To date, reaction videos have been one of the biggest viral video trends on TikTok. Marketers know this and have started writing reaction videos for popular brands, and the brands love it! A reaction video is a fan-made video on TikTok that is either about them or their product. This article will show you how to make a perfect reaction video for your brand within minutes. We’ll also provide resources to help with every step you need to get started.
In this article
01 What Is Tiktok Reaction Video
02 Why Are TikTok Videos So Popular?
03 10 Popular Tiktok reaction videos
04 Make a TikTok video Easily using Filmora
What Is Tiktok Reaction Video
Reaction videos are exactly what they sound like — a video of someone reacting to something. Reaction videos have been around since the early days of YouTube when people would upload their reactions to music, movies, and TV shows. But with the launch of TikTok in 2017, reaction videos exploded in popularity. They are one of the most popular video types on social media platforms.
Reaction videos are a type of video where people record their reactions to other content as it unfolds before them. Reaction videos are popular on TikTok because they elicit an emotional response from the viewer. The most common emotions are joy, sadness, surprise, disgust, fear, and anger. It’s easy to see why these videos are so popular — they’re fun!
Why Are TikTok Videos So Popular?
The popularity of TikTok reaction videos is easy to understand. It is fun to watch people react to something they’re seeing for the very first time. In addition, these types of videos are entertaining and silly. They are typically not too serious or dramatic in tone.
Reaction videos allow you to laugh at yourself or laugh with someone else who has been through something similar (or even worse). If someone else has gone through it before, the chances are that they’ve learned from their mistakes too! This could be an important lesson for you as well!
Reaction videos can give you perspective on your own life. You might realize that things aren’t as bad as they seem when seen through someone else’s eyes.
TikTok reaction videos are a great way to communicate your opinions on topics that are important to you. It gives you an outlet to express yourself engagingly and allows you to interact with your audience through comments, shares, and likes. Well, people love to watch other people react to things, for one thing. It’s a great way to get an authentic reaction from your audience. And if you can make a TikTok video that makes people laugh or cry, you’re going to win more fans and followers than you could imagine.
10 Popular Tiktok reaction videos
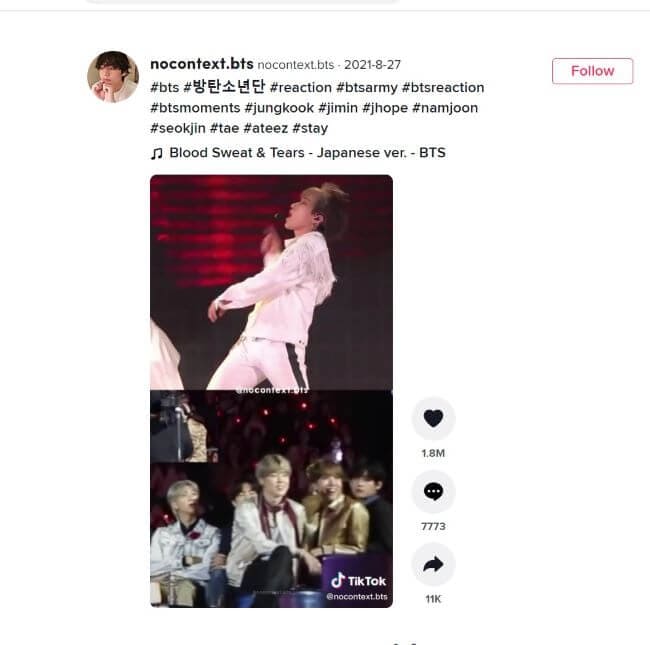
#1 BTS Dance Reaction
In this video, One dance group reacts to the video of another dance group, and it looks pretty amusing. The video has over 1.8 Million views and likes.
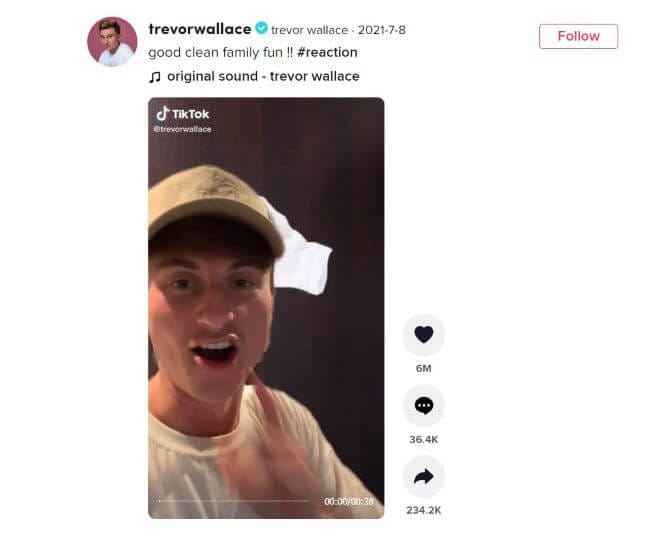
#2 Good Clean Family Fun
In this video, A guy reacts to a video in which someone is using cleaning gloves to make different shapes, and it turns out to be something funny and bold in the end. The video has over 6 Million views and Likes.
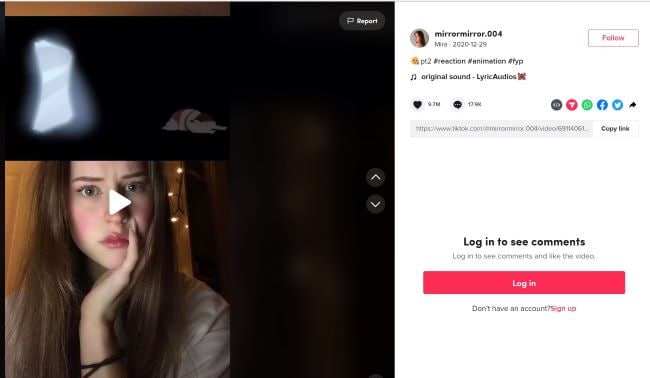
#3 mirror.004 Reaction
The creator is famous for making reaction videos. She reacts to animated cartoon videos in this video, and people love her gestures and expressions. The video has over 9.7M views and likes. Image 3
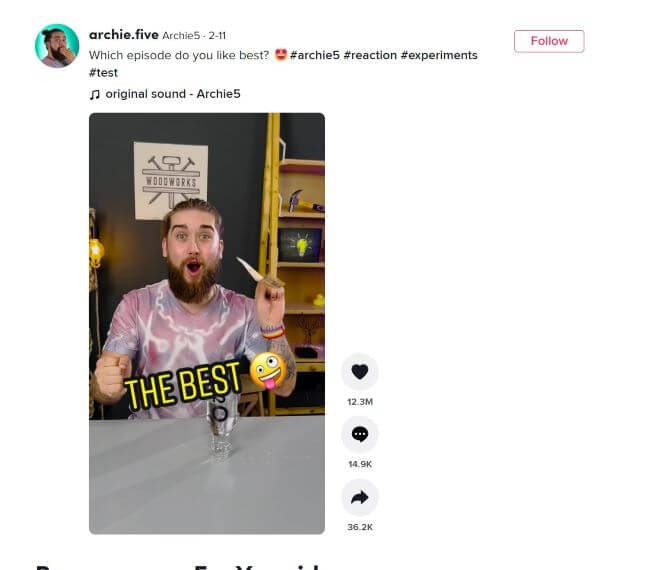
#4 Experiment Test Reaction
This is a funny video where the creator first reacts to the video of a female and then tries to mimic her video by doing a fun experiment. The video has over 12.2M likes and views.
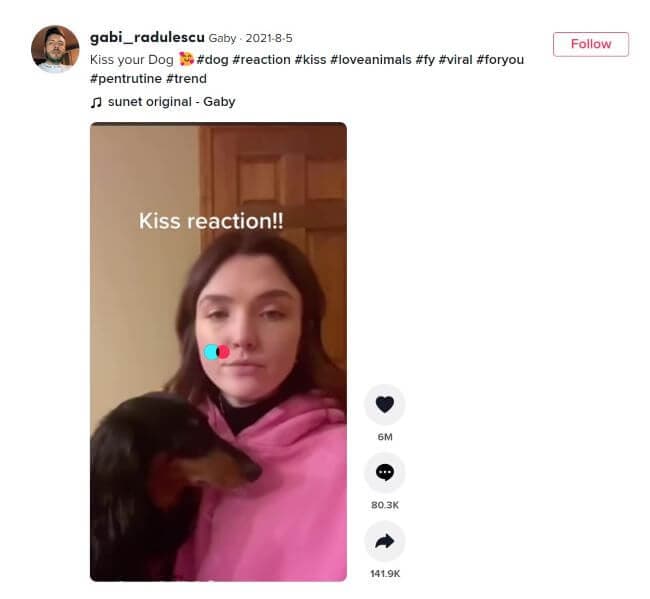
#5 Kiss your Dog Reaction
In this video, different people kiss their dogs and then record their reactions at the end. The video is quite interesting for pet lovers. It has over 6M likes and views.
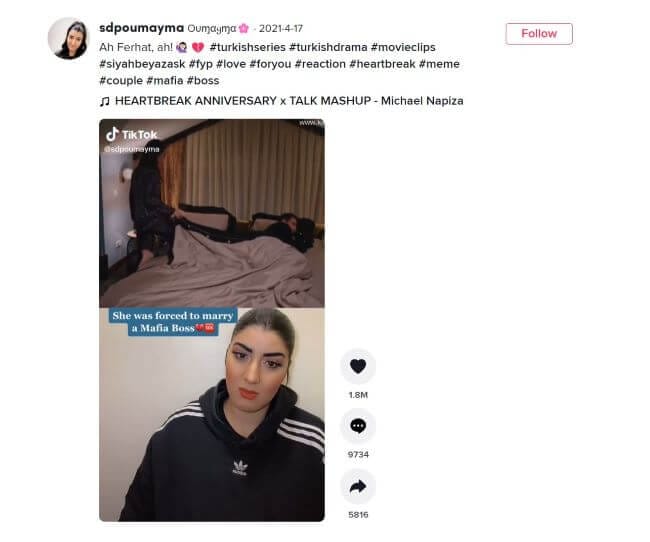
#6 Sdpoumayma Reaction
In this video, the creator reacts to the video of a girl who was forced to marry a mafia boss. The video has over 1.8 M views and likes.
#7 Ugly To Decent Reaction By Sabrina.Sir
In this video, the creator reacts to the videos of people that look ugly at the starting, but as the video flows, they turn out to be handsome and dashing. The video has over 1.7 million views and likes.

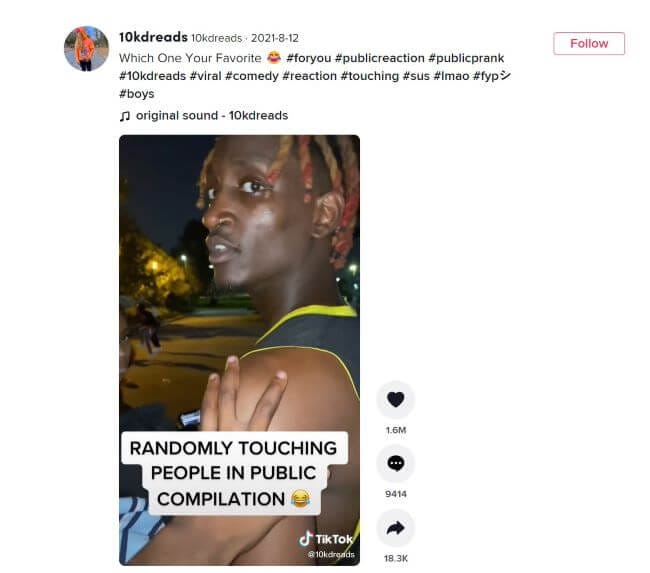
#8 Randomly Touching People In Public
In this video, the creator goes public and randomly touches strangers and records their reactions. There are different types of reactions, some are funny, and some people look annoyed. The video has over 1.6M views and likes.
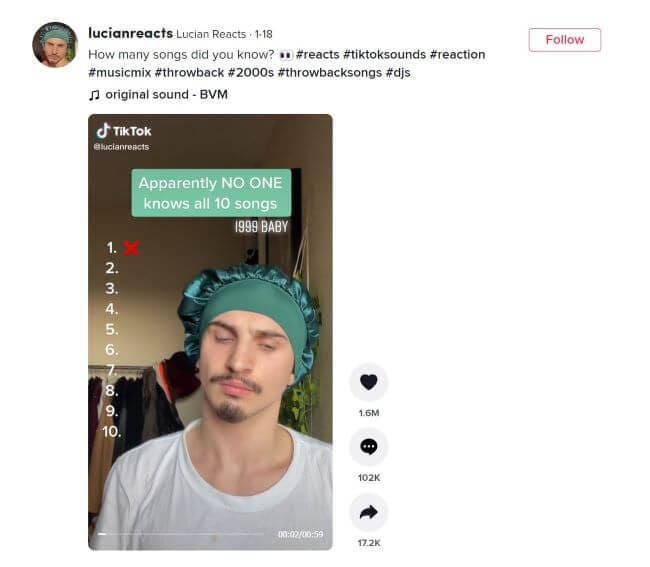
#9 How many songs did you know? By Lucian Reacts
In this video, the creator plays ten different songs and then false against the songs that have not been heard before and true against the songs he has heard before. His reaction to each song is quite amusing for the audience. The video has over 1.6M views and likes.
#10 Riche Duran Reacts on: Teacher Goes On Trial For Relationship With Student
In this video, the creator reacts to the video of a teacher having a trial in court for having a relationship with her student. The video is a bit funny, and the creator’s reaction is pretty amusing. The video has over 1.5M likes and views.
Make a TikTok video Easily using Filmora
If you look at the built-in video editor of the TikTok app, you will notice that the interface is not user-friendly at all. But this does not mean there is no way to make a TikTok music video. Filmora is an advanced video editor for both Mac and PC that has many features that make it a great choice for TikTok videos. We’ll walk you through the process:
Step 1: First of all, make sure that the latest version of Filmora Video editor is downloaded on your computer. If you haven’t already installed it, you can easily download it from the official website of Wondershare.
Step 2: Now, Install the application and run it on your computer.
Step 3: A window will appear on your screen where you need to select the new project option.
Step 4: In the next step, you need to select the aspect ratio. Keep in mind that by default, the aspect ratio will be 16:9, which is landscape, but since the TikTok videos are in portrait orientation, we need to select 9:16 and click ok.
Step 5: Now, you can import the media files to your Filmora library. Just click on the file, select import media, and click on the Import media files. Now select the video files that you want to edit, and they will be imported to your Filmora Library.
Step 6: Now, drag the videos from the Library and drop them to your timeline. Once you have the videos in your timeline, you can perform all the edits that you want to perform.
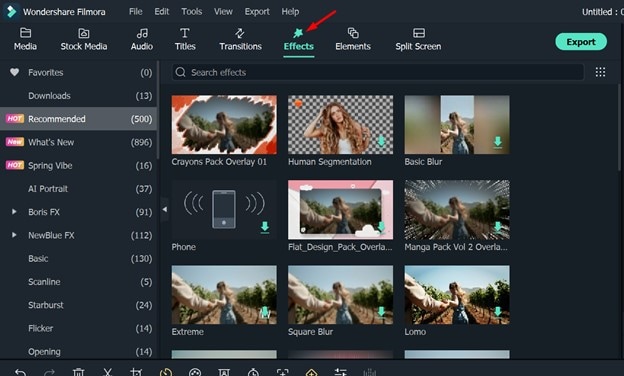
Step 7: If you want to add effects to your videos, then you can explore the effects section of Filmora, where you can find hundreds of cool effects to make your videos more interesting. If you like any effect and want to apply it to your video, drag the effect and drop it on the video track in the Filmora timeline.
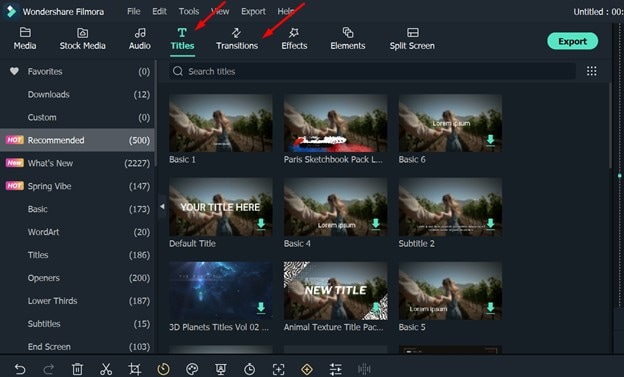
Step 8: Filmora also provides you with a variety of transitions and hundreds of interesting elements and titles that you can use in your videos to make them more appealing.
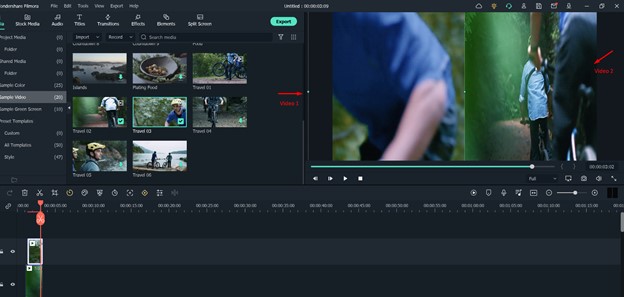
Step 9: If you are making a TikTok reaction video using Filmora, then you can easily play two videos side-by-side. You need to place two different videos in two different tracks in Filmora. Then select the first video and adjust the size of the video so that it covers the half area in the preview window. Then repeat the septs to cover the other half of the preview window. By doing this, you can easily make a reaction video in just a few minutes.
Step 10: You can add your favorite music to the background of your videos. Just import the music file to Filmora and add it to the music track in the timeline. Adjust the length of the music according to the length of the video, and it will be added to the background. You can also use the volume controls to adjust the loudness.
Step 11: Once you are satisfied with your video, all you need to do is export it to your system in your desired format and share it with your audience on TikTok.
For Win 7 or later (64-bit)
For macOS 10.12 or later
Final Verdict
● In short, Filmora is a fully-fledged video editor that provides you with a lot of extra features that you won’t get in the built-in editor of Tiktok. It gives you a lot of creative freedom. From adding different effects to editing and enhancing your videos, It can do it all.
● The best thing about Filmora is that you can try all its features for free without paying a single penny. If you are a beginner and have no prior knowledge of working with video editors, you will find it pretty easy to work with Filmora. There are plenty of resources and tutorials available to watch and start using today. Many professional Tiktokers are already using it and growing their audience day by day.
Are you a content creator looking for the next hot thing to post on TikTok? Look no further. To date, reaction videos have been one of the biggest viral video trends on TikTok. Marketers know this and have started writing reaction videos for popular brands, and the brands love it! A reaction video is a fan-made video on TikTok that is either about them or their product. This article will show you how to make a perfect reaction video for your brand within minutes. We’ll also provide resources to help with every step you need to get started.
In this article
01 What Is Tiktok Reaction Video
02 Why Are TikTok Videos So Popular?
03 10 Popular Tiktok reaction videos
04 Make a TikTok video Easily using Filmora
What Is Tiktok Reaction Video
Reaction videos are exactly what they sound like — a video of someone reacting to something. Reaction videos have been around since the early days of YouTube when people would upload their reactions to music, movies, and TV shows. But with the launch of TikTok in 2017, reaction videos exploded in popularity. They are one of the most popular video types on social media platforms.
Reaction videos are a type of video where people record their reactions to other content as it unfolds before them. Reaction videos are popular on TikTok because they elicit an emotional response from the viewer. The most common emotions are joy, sadness, surprise, disgust, fear, and anger. It’s easy to see why these videos are so popular — they’re fun!
Why Are TikTok Videos So Popular?
The popularity of TikTok reaction videos is easy to understand. It is fun to watch people react to something they’re seeing for the very first time. In addition, these types of videos are entertaining and silly. They are typically not too serious or dramatic in tone.
Reaction videos allow you to laugh at yourself or laugh with someone else who has been through something similar (or even worse). If someone else has gone through it before, the chances are that they’ve learned from their mistakes too! This could be an important lesson for you as well!
Reaction videos can give you perspective on your own life. You might realize that things aren’t as bad as they seem when seen through someone else’s eyes.
TikTok reaction videos are a great way to communicate your opinions on topics that are important to you. It gives you an outlet to express yourself engagingly and allows you to interact with your audience through comments, shares, and likes. Well, people love to watch other people react to things, for one thing. It’s a great way to get an authentic reaction from your audience. And if you can make a TikTok video that makes people laugh or cry, you’re going to win more fans and followers than you could imagine.
10 Popular Tiktok reaction videos
#1 BTS Dance Reaction
In this video, One dance group reacts to the video of another dance group, and it looks pretty amusing. The video has over 1.8 Million views and likes.
#2 Good Clean Family Fun
In this video, A guy reacts to a video in which someone is using cleaning gloves to make different shapes, and it turns out to be something funny and bold in the end. The video has over 6 Million views and Likes.
#3 mirror.004 Reaction
The creator is famous for making reaction videos. She reacts to animated cartoon videos in this video, and people love her gestures and expressions. The video has over 9.7M views and likes. Image 3
#4 Experiment Test Reaction
This is a funny video where the creator first reacts to the video of a female and then tries to mimic her video by doing a fun experiment. The video has over 12.2M likes and views.
#5 Kiss your Dog Reaction
In this video, different people kiss their dogs and then record their reactions at the end. The video is quite interesting for pet lovers. It has over 6M likes and views.
#6 Sdpoumayma Reaction
In this video, the creator reacts to the video of a girl who was forced to marry a mafia boss. The video has over 1.8 M views and likes.
#7 Ugly To Decent Reaction By Sabrina.Sir
In this video, the creator reacts to the videos of people that look ugly at the starting, but as the video flows, they turn out to be handsome and dashing. The video has over 1.7 million views and likes.
#8 Randomly Touching People In Public
In this video, the creator goes public and randomly touches strangers and records their reactions. There are different types of reactions, some are funny, and some people look annoyed. The video has over 1.6M views and likes.
#9 How many songs did you know? By Lucian Reacts
In this video, the creator plays ten different songs and then false against the songs that have not been heard before and true against the songs he has heard before. His reaction to each song is quite amusing for the audience. The video has over 1.6M views and likes.
#10 Riche Duran Reacts on: Teacher Goes On Trial For Relationship With Student
In this video, the creator reacts to the video of a teacher having a trial in court for having a relationship with her student. The video is a bit funny, and the creator’s reaction is pretty amusing. The video has over 1.5M likes and views.
Make a TikTok video Easily using Filmora
If you look at the built-in video editor of the TikTok app, you will notice that the interface is not user-friendly at all. But this does not mean there is no way to make a TikTok music video. Filmora is an advanced video editor for both Mac and PC that has many features that make it a great choice for TikTok videos. We’ll walk you through the process:
Step 1: First of all, make sure that the latest version of Filmora Video editor is downloaded on your computer. If you haven’t already installed it, you can easily download it from the official website of Wondershare.
Step 2: Now, Install the application and run it on your computer.
Step 3: A window will appear on your screen where you need to select the new project option.
Step 4: In the next step, you need to select the aspect ratio. Keep in mind that by default, the aspect ratio will be 16:9, which is landscape, but since the TikTok videos are in portrait orientation, we need to select 9:16 and click ok.
Step 5: Now, you can import the media files to your Filmora library. Just click on the file, select import media, and click on the Import media files. Now select the video files that you want to edit, and they will be imported to your Filmora Library.
Step 6: Now, drag the videos from the Library and drop them to your timeline. Once you have the videos in your timeline, you can perform all the edits that you want to perform.
Step 7: If you want to add effects to your videos, then you can explore the effects section of Filmora, where you can find hundreds of cool effects to make your videos more interesting. If you like any effect and want to apply it to your video, drag the effect and drop it on the video track in the Filmora timeline.
Step 8: Filmora also provides you with a variety of transitions and hundreds of interesting elements and titles that you can use in your videos to make them more appealing.
Step 9: If you are making a TikTok reaction video using Filmora, then you can easily play two videos side-by-side. You need to place two different videos in two different tracks in Filmora. Then select the first video and adjust the size of the video so that it covers the half area in the preview window. Then repeat the septs to cover the other half of the preview window. By doing this, you can easily make a reaction video in just a few minutes.
Step 10: You can add your favorite music to the background of your videos. Just import the music file to Filmora and add it to the music track in the timeline. Adjust the length of the music according to the length of the video, and it will be added to the background. You can also use the volume controls to adjust the loudness.
Step 11: Once you are satisfied with your video, all you need to do is export it to your system in your desired format and share it with your audience on TikTok.
For Win 7 or later (64-bit)
For macOS 10.12 or later
Final Verdict
● In short, Filmora is a fully-fledged video editor that provides you with a lot of extra features that you won’t get in the built-in editor of Tiktok. It gives you a lot of creative freedom. From adding different effects to editing and enhancing your videos, It can do it all.
● The best thing about Filmora is that you can try all its features for free without paying a single penny. If you are a beginner and have no prior knowledge of working with video editors, you will find it pretty easy to work with Filmora. There are plenty of resources and tutorials available to watch and start using today. Many professional Tiktokers are already using it and growing their audience day by day.
Perfect Everyday TikTok Footage with Simple Tricks
Whether sardonic, informative, or both, voiceovers can improve a TikTok video for humor and clarity.
What do sewing how-to videos, cooking tutorials, and daily vlogs have in common? They all probably are dependent on TikTok’s voiceover feature, which can be helpful in the inbuilt editing suite of the TikTok app.
Ever wished to record a TikTok and save it for later without letting the publisher know? Then, it is always the best idea to learn how to screen record on TikTok. This article will help you learn multiple ways of screen recording on TikTok without you having to worry about the other person knowing.
And, we’ll also look at how to do a voiceover on TikTok using the step-by-step guide mentioned below.
In this article
01 How to Screen Record on TikTok?
02 How to Add Voiceover to the TikTok Video?
03 Add Voiceover to TikTok Video with Extra Fusion: Wondershare Filmora
Part 1: How to Screen Record on TikTok?
Have you ever accidentally taken a screenshot of someone’s Instagram story or screen recorded it for future reference and got scared that the person may have got notified?
While Instagram had the feature of notifying users if their story or picture has been screen recorded, it has recently changed to restrict this notification to images and videos sent via private DMs.
However, TikTokers can rest assured as TikTok has never had a similar notification feature, and you can safely screen record TikTok without mentioning the publisher.
How to Record Computer Screens on Windows
PCs allow software products useful for various purposes. For example, if you would like to record your PC screen while using Windows-based software, you’ll be required a powerful screen recorder that lets you set up a new screencasting session in just a few simple steps.
Here are some of the steps you need to consider!
Step 1: Download Wondershare Filmora
Download Wondershare Filmora onto your computer and then launch the software.
Wondershare Filmora
Get started easily with Filmora’s powerful performance, intuitive interface, and countless effects!
Try It Free Try It Free Try It Free Learn More >

Just visit the browser and type the URL ‘tiktok.com’ in the search bar. Then, look for the TikTok video you would like to record.
Besides providing functions that activate you to control the screen recording procedure entirely, Wondershare Filmora is also a video editor program that lets you manipulate your videos in any way you want.
You must double-click on its desktop icon and open the Full Feature mode right after launching the software. Now, hit the Record tab and choose the Record PC screen option.
The Wondershare Screen Recorder window will appear on the screen so you can modify the settings for your upcoming screencasting session.

You’ll see the Settings icon in the window’s lower right corner and then click it. For example, you can select the computer’s hard drive destination where the recording will be saved, modify the frame rate or set the quality of the recording from the Quality drop-down menu.

Hit the Microphone icon to choose the mic you’ll be using to record narration, and you can select the Speakers icon if you want to disable or enable the computer’s speakers during the session of screen recording.
You’ll see the Settings icon in the window’s lower right corner and then click it. For example, you can select the computer’s hard drive destination where the recording will be saved, modify the frame rate or set the quality of the recording from the Quality drop-down menu.

Mark the Mouse checkbox if you wish the mouse clicks to display in the recording, and you can easily place the maximum duration of a recording session. It is done by inserting the preferred default screen recording duration into the Record Timer box.

Hit the Rec button to begin a new screencasting session, and the software will start recording after a three-second countdown.
Tap the F9 button on the keyboard to stop recording. It will automatically open the file in Filmora’s video editor so you can edit it before publishing online.
Part 2: How to Add Voiceover to the TikTok Video?
Steps to add a voiceover to your TikTok video.
Upload or record a new video by hitting the + at the menu’s center at the screen’s bottom area.
Hit the microphone icon on the screen’s upper right corner once you’re over with the recording and trimming clips to your desired edit. Beneath, the microphone icon must mention “Voiceover.”

Source: mashable.com
Now, you can record a voiceover timed to Video’s every frame here.
Hit the “Save“ button once you’re satisfied with the voiceover

Hitting the “Save“ button will offer you back to the video’s preview, where you can add filters, text, stickers, and various sounds.
It is needed to add effects to your voiceover by hitting the “voice effects”. Here, you can control the narrator’s volume as well.
Also, make sure to enable automatic captions to make sure your video is more accessible!
Tap the Next button once you’re over with your Video. Then, you can edit the Video’s privacy settings, add a caption, and select a cover.
Part 3: Add Voiceover to TikTok Video with Extra Fusion: Wondershare Filmora
Do you want to include your voice in a video, create a voiceover demo for sharing and uploading on social networking platforms, or frame a documentary for important content?
All you need is an ideal video editing program similar to the Wondershare Filmora Video Editor.
The Filmora’s voiceover feature allows you to record your voice or add voice-over files to Video easily. In addition, you can customize the pitch, speed, and volume of the recorded voiceover and apply fade-in and fade-out effects. I’ll share how to register and add voiceover to a video with Filmora on your computer in this post.
Firstly, you can edit your Video in Filmora and then record the voiceover afterward. Or, you can first record the voiceover and then edit the Video around.
Check the steps below on how to make TikTok videos with voiceover via Wondershare Filmora.
Wondershare Filmora
Get started easily with Filmora’s powerful performance, intuitive interface, and countless effects!
Try It Free Try It Free Try It Free Learn More >
Record Voiceover and Add it to Video
We suggest you record the voiceover first in most cases so the sound will become pretty natural.
Step 1: Connect Microphone to PC or laptop
Connect the microphone to your laptop/PC when you’re ready to begin. It’s advisable to use some professional external microphones to capture high-quality sound.
Step 2: Record voiceover
Tap the Wondershare Filmora icon to launch this software. Then, select the New Project option in the beginning interface to create a new one.
Enter the Record tab and choose the “Record a Voiceover” option to arouse the Record Audio windows.
Or hit the microphone icon, and you only need 3 seconds of countdown to begin speaking.
Click the microphone icon again after you finish the above. Then, a new Record file option will be automatically present on the audio track.
Step 3: Edit Recorded Voiceover to Video
To edit the recorded voiceover, you can adjust audio settings, such as changing the Speed, Pitch, Volume, etc.

You can cut and trim out unnecessary sound sections from the recorded voiceover or apply the fade effects to the voiceover for a smoother transition.
Step 4: Sync Voiceover to Video
Now, it’s time to synchronize the recorded voiceover to video to create a compelling video.
The Wondershare Filmora allows up to 100 audio tracks; you can also add some background music to the voiceover.
Then import and drag-n-drop the video content to the video track, drag and drop the soundtrack to the video’s right-side position. Keep the voice and video track in the exact video duration if required.
Here’s how to sync voiceover to video!
Now, sync the recorded voiceover to Video to create a video. Since Filmora is compatible with 100 plus audio tracks, you can add different background music to the voiceover.
Then import and drag-n-drop the video content to the video track, drag and drop the soundtrack to the Video’s right side position. You can keep the Video and audio track in the same video duration.

Note: If you’ve recorded the iPhone voiceover or other device already, you can import it in the Project Library if you wish to add it to the Video and then sync it to Video.
Here is the ultimate step-by-step guide about adding titles to videos after knowing how to do a voiceover on TikTok.
Step 5: Export and save the new file
Click the “Export“ tab to export your new video file after you complete the project. You can either save the Video to different formats or directly share it on other social media platforms.
Additionally, you can even burn a DVD in minutes to watch it on TV.
How to Record and Add Voice over File during Filmora’s Video Editing Process
If you’ve recorded the voice over on your iPhone or another device already, even via the Wondershare Filmora, and wish to add it to the Video, visit the steps mentioned below:
1. Upload the video to Filmora
After logging in to Filmora’s main editing interface, click “Import” or drag-drop your video and voiceover file to the project library.
Filmora video editing software is compatible with a vast range of formats, so there will be no need to convert the files before import.
Drag and drop the files or video content to the Video Timeline when all the files get imported.
2. Record Voiceover in Video Editing
3. Edit voiceover and Export
You can then edit the recorded voiceover for TikTok to perfectly fit the Video and export it to your laptop/PC or directly upload it to YouTube.
For improving the sound, Filmora features more audio editing tools.
Conclusion
This article offered you a step-by-step guide on how to record a TikTok. It also displays four different screen recording methods, along with how to do a voiceover on TikTok.
Now, don’t ever worry about losing out on your favorite TikTok without the original publisher knowing via screen record TikTok via Wondershare Filmora.
02 How to Add Voiceover to the TikTok Video?
03 Add Voiceover to TikTok Video with Extra Fusion: Wondershare Filmora
Part 1: How to Screen Record on TikTok?
Have you ever accidentally taken a screenshot of someone’s Instagram story or screen recorded it for future reference and got scared that the person may have got notified?
While Instagram had the feature of notifying users if their story or picture has been screen recorded, it has recently changed to restrict this notification to images and videos sent via private DMs.
However, TikTokers can rest assured as TikTok has never had a similar notification feature, and you can safely screen record TikTok without mentioning the publisher.
How to Record Computer Screens on Windows
PCs allow software products useful for various purposes. For example, if you would like to record your PC screen while using Windows-based software, you’ll be required a powerful screen recorder that lets you set up a new screencasting session in just a few simple steps.
Here are some of the steps you need to consider!
Step 1: Download Wondershare Filmora
Download Wondershare Filmora onto your computer and then launch the software.
Wondershare Filmora
Get started easily with Filmora’s powerful performance, intuitive interface, and countless effects!
Try It Free Try It Free Try It Free Learn More >
Just visit the browser and type the URL ‘tiktok.com’ in the search bar. Then, look for the TikTok video you would like to record.
Besides providing functions that activate you to control the screen recording procedure entirely, Wondershare Filmora is also a video editor program that lets you manipulate your videos in any way you want.
You must double-click on its desktop icon and open the Full Feature mode right after launching the software. Now, hit the Record tab and choose the Record PC screen option.
The Wondershare Screen Recorder window will appear on the screen so you can modify the settings for your upcoming screencasting session.
You’ll see the Settings icon in the window’s lower right corner and then click it. For example, you can select the computer’s hard drive destination where the recording will be saved, modify the frame rate or set the quality of the recording from the Quality drop-down menu.
Hit the Microphone icon to choose the mic you’ll be using to record narration, and you can select the Speakers icon if you want to disable or enable the computer’s speakers during the session of screen recording.
You’ll see the Settings icon in the window’s lower right corner and then click it. For example, you can select the computer’s hard drive destination where the recording will be saved, modify the frame rate or set the quality of the recording from the Quality drop-down menu.
Mark the Mouse checkbox if you wish the mouse clicks to display in the recording, and you can easily place the maximum duration of a recording session. It is done by inserting the preferred default screen recording duration into the Record Timer box.
Hit the Rec button to begin a new screencasting session, and the software will start recording after a three-second countdown.
Tap the F9 button on the keyboard to stop recording. It will automatically open the file in Filmora’s video editor so you can edit it before publishing online.
Part 2: How to Add Voiceover to the TikTok Video?
Steps to add a voiceover to your TikTok video.
Upload or record a new video by hitting the + at the menu’s center at the screen’s bottom area.
Hit the microphone icon on the screen’s upper right corner once you’re over with the recording and trimming clips to your desired edit. Beneath, the microphone icon must mention “Voiceover.”
Source: mashable.com
Now, you can record a voiceover timed to Video’s every frame here.
Hit the “Save“ button once you’re satisfied with the voiceover
Hitting the “Save“ button will offer you back to the video’s preview, where you can add filters, text, stickers, and various sounds.
It is needed to add effects to your voiceover by hitting the “voice effects”. Here, you can control the narrator’s volume as well.
Also, make sure to enable automatic captions to make sure your video is more accessible!
Tap the Next button once you’re over with your Video. Then, you can edit the Video’s privacy settings, add a caption, and select a cover.
Part 3: Add Voiceover to TikTok Video with Extra Fusion: Wondershare Filmora
Do you want to include your voice in a video, create a voiceover demo for sharing and uploading on social networking platforms, or frame a documentary for important content?
All you need is an ideal video editing program similar to the Wondershare Filmora Video Editor.
The Filmora’s voiceover feature allows you to record your voice or add voice-over files to Video easily. In addition, you can customize the pitch, speed, and volume of the recorded voiceover and apply fade-in and fade-out effects. I’ll share how to register and add voiceover to a video with Filmora on your computer in this post.
Firstly, you can edit your Video in Filmora and then record the voiceover afterward. Or, you can first record the voiceover and then edit the Video around.
Check the steps below on how to make TikTok videos with voiceover via Wondershare Filmora.
Wondershare Filmora
Get started easily with Filmora’s powerful performance, intuitive interface, and countless effects!
Try It Free Try It Free Try It Free Learn More >
Record Voiceover and Add it to Video
We suggest you record the voiceover first in most cases so the sound will become pretty natural.
Step 1: Connect Microphone to PC or laptop
Connect the microphone to your laptop/PC when you’re ready to begin. It’s advisable to use some professional external microphones to capture high-quality sound.
Step 2: Record voiceover
Tap the Wondershare Filmora icon to launch this software. Then, select the New Project option in the beginning interface to create a new one.
Enter the Record tab and choose the “Record a Voiceover” option to arouse the Record Audio windows.
Or hit the microphone icon, and you only need 3 seconds of countdown to begin speaking.
Click the microphone icon again after you finish the above. Then, a new Record file option will be automatically present on the audio track.
Step 3: Edit Recorded Voiceover to Video
To edit the recorded voiceover, you can adjust audio settings, such as changing the Speed, Pitch, Volume, etc.
You can cut and trim out unnecessary sound sections from the recorded voiceover or apply the fade effects to the voiceover for a smoother transition.
Step 4: Sync Voiceover to Video
Now, it’s time to synchronize the recorded voiceover to video to create a compelling video.
The Wondershare Filmora allows up to 100 audio tracks; you can also add some background music to the voiceover.
Then import and drag-n-drop the video content to the video track, drag and drop the soundtrack to the video’s right-side position. Keep the voice and video track in the exact video duration if required.
Here’s how to sync voiceover to video!
Now, sync the recorded voiceover to Video to create a video. Since Filmora is compatible with 100 plus audio tracks, you can add different background music to the voiceover.
Then import and drag-n-drop the video content to the video track, drag and drop the soundtrack to the Video’s right side position. You can keep the Video and audio track in the same video duration.
Note: If you’ve recorded the iPhone voiceover or other device already, you can import it in the Project Library if you wish to add it to the Video and then sync it to Video.
Here is the ultimate step-by-step guide about adding titles to videos after knowing how to do a voiceover on TikTok.
Step 5: Export and save the new file
Click the “Export“ tab to export your new video file after you complete the project. You can either save the Video to different formats or directly share it on other social media platforms.
Additionally, you can even burn a DVD in minutes to watch it on TV.
How to Record and Add Voice over File during Filmora’s Video Editing Process
If you’ve recorded the voice over on your iPhone or another device already, even via the Wondershare Filmora, and wish to add it to the Video, visit the steps mentioned below:
1. Upload the video to Filmora
After logging in to Filmora’s main editing interface, click “Import” or drag-drop your video and voiceover file to the project library.
Filmora video editing software is compatible with a vast range of formats, so there will be no need to convert the files before import.
Drag and drop the files or video content to the Video Timeline when all the files get imported.
2. Record Voiceover in Video Editing
3. Edit voiceover and Export
You can then edit the recorded voiceover for TikTok to perfectly fit the Video and export it to your laptop/PC or directly upload it to YouTube.
For improving the sound, Filmora features more audio editing tools.
Conclusion
This article offered you a step-by-step guide on how to record a TikTok. It also displays four different screen recording methods, along with how to do a voiceover on TikTok.
Now, don’t ever worry about losing out on your favorite TikTok without the original publisher knowing via screen record TikTok via Wondershare Filmora.
Also read:
- [Updated] In 2024, Speedy TikTok Video Creation A Comprehensible Guide
- [New] Transforming Your TikTok Presence A Detailed Walkthrough for 2024
- [New] In 2024, Extraordinary Escapades The Ultimate List of Strange TikTok Titles
- The Perennial Playlist Unforgettable Tunes From 2024'S TikTok Stars
- [Updated] 2024 Approved Inspiration Unleashed Top 15 TikTokers From Around the Globe
- [Updated] The Secrets Behind the Most Influential TikTok Marketing Movements
- [Updated] In 2024, Foodie Hits Top TikTok Chefs & Cooks
- [New] Streamlined Process Chrome/Android/iOS TikTok Posting for 2024
- Choreographed Chaos Blending Dance & Dissonance in TikToks
- Rapid Rise How to Transform Your TikTok Images Dramatically
- [New] In 2024, Uniting Voices in a TikTok Duo
- 2024 Approved Exclusive Look at Top 10 Gamers on TikTok
- [Updated] 2024 Approved Amplify Your Video Impact Hottest TikTok Filters Guide
- [New] Mastering Profile Transformation on TikTok - A Guide
- [New] Navigating TikTok to Perfect Your Digital Twin for 2024
- [New] In 2024, Mastering the Art of Content TikTok's Most Viewed Tags
- [Updated] In 2024, The Groove Guide Navigating Today's Hot Raps in 156 Characters or Less
- In 2024, Transform Videos The Best TikTok Filters of the Year
- [New] Navigating Video Upload Procedures on Chrome Devices
- [New] In 2024, The Creative Process Behind Bigger-Head Effects for TikTok Films (3 Techniques)
- In 2024, Hot TikTok Picks for Your Amazon Shopping Spree
- 2024 Approved Transforming Ordinary to Exceptional TikTok PFPs
- [Updated] 2024 Approved Bridge to TikTok Lives Secrets of Successful Entry
- Top 50+ TikTok Quotes to Amplify Impact for 2024
- 2024 Approved Savoring the Best TikTok Food Videos
- [New] In 2024, Simplifying Your TikTok Journey on Macs and Windows
- [Updated] 2024 Approved The Art of Editing Crafting TikTok Success Stories on Mac
- 2024 Approved Quietude Craft Isolating Vocal Frequencies in Audacity
- In 2024, Discover the 10 Cutest/Scariest TikTok Filters Ever
- 2024 Approved Virtual Band Gigs on BigoLive
- [New] Dual App Review Analyzing Triller and TikTok's Features (Max 156 Chars) for 2024
- [Updated] Stepwise Voice Transformation Techniques for TikTokers
- [Updated] In 2024, Accelerate TikTok Popularity Essential Countdown Guidance
- [New] Premium Money Forecasting Aid for TikTok Artists for 2024
- [New] 2024 Approved Make Your Mark on TikTok Top 30 Unique PFPs
- [Updated] Essential Apps for Cleaning TikTok Video Logos
- [New] Syncopation Spotlight Hits That Have Hit the High Note on TikTok
- [New] Top App for Turning Viral Videos Into Memetic Graphics
- [New] In 2024, Tiktok Food | 10 Viral Tiktok Food Recipes
- [New] Who Are The World's Most Viral TikTok Stars? #Inspiration
- [Updated] In 2024, Secrets of 10 Excellent TikTok Marketing Initiatives
- [Updated] In 2024, From Buzz to Sales Transforming Social Media Into Traffic
- [New] 2024 Approved Frenzied Funhouse A Guide to Wildest TikTok Games
- [New] In 2024, Enhance Your Memes Top TikTok-to-GIF Software Choices
- [New] In 2024, Cinematic Surprises The Most Impactful TikTok Editing Tools
- [New] 2024 Approved Finest TikTok Creation Software for Windows Desktop
- [New] Engaging TikTok Audiences How & Why Successful Advertising Works
- [Updated] Unlock More Views with These TikTok Text Tools of 2023 for 2024
- Fix the Error of Unfortunately the Process.com.android.phone Has Stopped on Infinix Hot 40i | Dr.fone
- New In 2024, Audio Integration in Motion Picture Editing A Step-by-Step Approach
- Complete Guide on Unlocking Apple iPhone 8 with a Broken Screen?
- In 2024, How To Bypass iCloud By Checkra1n Even On Apple iPhone 6 Plus If Youve Tried Everything
- [New] Produce FB Profile Visuals
- [Updated] 2024 Approved How to Do Screen Recording on Iphone Easily?
- [New] 2024 Approved Innovative Broadcast Strategies Live on Instagram Using OBS Software
- 5 Techniques to Transfer Data from Realme Note 50 to iPhone 15/14/13/12 | Dr.fone
- Capture GIFs Flawlessly with Mac's Top Apps
- Updated Shrink Your Videos 10 Free Online Compressors with No Installation
- Title: "[New] 2024 Approved The Ultimate Guide to Popular TikTok Reactions"
- Author: Stephen
- Created at : 2024-05-23 04:21:02
- Updated at : 2024-05-24 04:21:02
- Link: https://tiktok-video-recordings.techidaily.com/new-2024-approved-the-ultimate-guide-to-popular-tiktok-reactions/
- License: This work is licensed under CC BY-NC-SA 4.0.
