![[New] Needlework Networking Sewing Skills in Social Spaces (TikTok)](https://www.lifewire.com/thmb/N3leTNiPss-gtYMmm8iFNKAGbMI=/400x300/filters:no_upscale():max_bytes(150000):strip_icc()/ScreenShot2018-03-20at3.12.15PM-5ab15d7c0e23d900379a8a4f.png)
"[New] Needlework Networking Sewing Skills in Social Spaces (TikTok)"
Needlework Networking: Sewing Skills in Social Spaces (TikTok)
Best Video Editor for Beginners on Windows and Mac
Wondershare Filmora is one of the most popular video editing software among TikTokers , download and have a try.
TikTok’s collaborative nature is one of its most appealing features. Your video is not finished the moment you publish it. They can be responded to, remixed, and re-shared by anybody. TikTok is meant to allow users to construct on other’s films shared on the network, whether you’re utilizing audio from some other video or making a duet.
Thanks to the stitch tool, creators may remix, remake, and reply to videos with a couple of taps. This article will tell you what you need to know about stitching videos on TikTok. Continue reading to learn more about Stitching and how to stitch on TikTok. Let’s get started!
In this article
02 How to Turn Stitch On or Off?
04 How to Stitch Any TikTok Video withFilmora Video Editor ?
05 FAQs About TikTok Video Stitch
Part 1: What is Stitch on TikTok?
TikTok’s latest video editing tool ‘Stitch,’ lets people incorporate video snippets from other people into their own. Creators may use Stitch to provide a five-second snippet from a TikTok video out of their own. Unlike duets that play videos together, stitched videos play in the sequence they were stitched. Videos containing open-ended questions have gained in popularity with the advent of the stitch.
Whenever you Stitch a clip-on TikTok, you are essentially inserting your video after yet another video that has already been submitted. People frequently utilize this to remark on or reply to other videos. And, when done well, it can add a lot more context to your movies.
The one limitation of the Stitch tool is that you may only publish up to five seconds from some other video. So, if you’re focusing on a Stitch, you must select the five seconds which are most critical to highlight your message.
Part 2: How to Turn Stitch On or Off?
By enabling the Stitch feature, you make your material available to millions of prospective collaborators. Consider the possibilities – it might be a fantastic approach to enhance reach and virility.
If you aren’t comfortable exposing your films to the whole TikTok community, users can opt out of allowing others to Stitch their work. You may modify them under the Privacy Controls. Here’s how to do a Stitch on TikTok:
Step 1: Launch the TikTok app and then head to your profile by clicking on the Profile option at the bottom right. After that, select the three dots to open the settings.
Step 2: After entering the settings, select Privacy to proceed, and then tap on the Stitch option to open the Stitch settings.
Step 3: Now, you will see three options that are No-one, Everyone, and Friends. If you want to allow the Stitching, select either Everyone or Friends. However, to restrict the people from stitching your videos, choose No-one. After you are done selecting, click on the back arrow to save the applied changes.
Part 3: How to Stitch on TikTok?
TikTok keeps giving creators more reasons to continue producing, and fans like us are more committed to continuing to open it. Stitch, a new app functionality from the famous social networking platform, makes things more straightforward than ever for artists to interact with each other.
But, you might be wondering, how to do a stitch on TikTok? Don’t worry; you’ve come to the right place. Here’s how:
Step 1: Launch TikTok and then go to the video that you want to stitch. Select the Share icon, which resembles an arrow. Select the Stitch symbol from the menu that displays, and then wait a few seconds for the video to complete. The lengthier the video is, the more the loading time.

Step 2: When it’s finished, you’ll be sent to a screen where you may take five seconds of the film and use it on your own. To navigate through the movie, use the sliders and the red bars to choose the portion you want. When you’re finished, tap Next.

Step 3: You’ll be sent to TikTok’s normal recording screen. Record the remainder of your TikTok video with all of the features you’re accustomed to utilizing. You may use whatever effects, stickers, texts, voiceovers, or captions you desire. After that, press the Next button.

Step 4: Make a title and hashtags for your TikTok video. You could also choose whether or not these users may Stitch your movie here – hit the toggle switch beside Allow Stitch to turn it off. Following that, hit the Post option, and your stitched video will be uploaded.

Part 4: How to Stitch Any TikTok Video with Filmora Video Editor ?
Before getting started, understand why people opt for Filmora video editor for stitching videos on TikTok when this can be done through the official TikTok application. TikTok app only allows you to stitch a video for up to five seconds which is quite frustrating if you wish to stitch an entire video.
One more reason is that, with TikTok, you cannot stitch the already existing video from the camera roll, which restricts creators from adding the already edited content to the existing video. So, to avoid the above problems, Filmora is used for stitching TikTok videos.
For Win 7 or later (64-bit)
For macOS 10.12 or later
To begin, download the video that you wish to stitch with from TikTok. After, follow the below stepwise guide:
Step 1: Launch the Filmora software on your PC and import the video files by clicking on the File and then Import/Export Media. You can simply drag and drop the videos as well.
Step 2: Drag the clips from the media library to the Timeline’s video track. All video files will be stitched into a single video with no transitions.

Note: To add a transition to the video , go to the Transition tab and drop the desired transition to the junction of two clips.

Step 3: Now, preview the stitched video and, when finished, click the Export option to save numerous video segments to a single file. Choose any format from the Format tab’s list.
Part 5: FAQs About TikTok Video Stitch
1. Can you do a Stitch on TikTok with a video from your Camera Roll?
Unfortunately, you cannot utilize a video from your Camera Roll in a Stitch at the time of this writing. So, whatever your reaction to a Stitch is, you must record 100% unique footage shot with the TikTok camera. However, you may download the video first and then stitch it with some third-party software such as Filmora.
2. Can you stitch longer than 5 seconds?
No, it is not possible to stitch a video for longer than five seconds using the built-in Stitching feature of the TikTok app. But this can be done by stitching the videos using third-party applications and software.
3. How do I see TikTok stitches?
Users who want to view as many stitches as possible can do it by browsing for them on the app. You must first browse to Discover, and from there to the search box. Then type #Stitch @username, where the username is the name of the account from which you wish to view stitches.
4. TikTok Stitch option not showing. How to fix it?
Users may choose whether or not someone else can Stitch their work in their settings. The option may be found under the Settings and Privacy tab, where users can activate or uncheck Stitch for all videos. So, if the Stitch option is not showing, the user may have disabled the Stitch option.
Conclusion
The Stitch feature is an excellent way to continue the discussion with your videos. You may leave comments on popular content on the site. Most importantly, it may be a fun method to generate material different from what you usually publish. And since you know How to Stitch on TikTok after reading this article, stitch the videos today and create unique content!
TikTok’s collaborative nature is one of its most appealing features. Your video is not finished the moment you publish it. They can be responded to, remixed, and re-shared by anybody. TikTok is meant to allow users to construct on other’s films shared on the network, whether you’re utilizing audio from some other video or making a duet.
Thanks to the stitch tool, creators may remix, remake, and reply to videos with a couple of taps. This article will tell you what you need to know about stitching videos on TikTok. Continue reading to learn more about Stitching and how to stitch on TikTok. Let’s get started!
In this article
02 How to Turn Stitch On or Off?
04 How to Stitch Any TikTok Video withFilmora Video Editor ?
05 FAQs About TikTok Video Stitch
Part 1: What is Stitch on TikTok?
TikTok’s latest video editing tool ‘Stitch,’ lets people incorporate video snippets from other people into their own. Creators may use Stitch to provide a five-second snippet from a TikTok video out of their own. Unlike duets that play videos together, stitched videos play in the sequence they were stitched. Videos containing open-ended questions have gained in popularity with the advent of the stitch.
Whenever you Stitch a clip-on TikTok, you are essentially inserting your video after yet another video that has already been submitted. People frequently utilize this to remark on or reply to other videos. And, when done well, it can add a lot more context to your movies.
The one limitation of the Stitch tool is that you may only publish up to five seconds from some other video. So, if you’re focusing on a Stitch, you must select the five seconds which are most critical to highlight your message.
Part 2: How to Turn Stitch On or Off?
By enabling the Stitch feature, you make your material available to millions of prospective collaborators. Consider the possibilities – it might be a fantastic approach to enhance reach and virility.
If you aren’t comfortable exposing your films to the whole TikTok community, users can opt out of allowing others to Stitch their work. You may modify them under the Privacy Controls. Here’s how to do a Stitch on TikTok:
Step 1: Launch the TikTok app and then head to your profile by clicking on the Profile option at the bottom right. After that, select the three dots to open the settings.
Step 2: After entering the settings, select Privacy to proceed, and then tap on the Stitch option to open the Stitch settings.
Step 3: Now, you will see three options that are No-one, Everyone, and Friends. If you want to allow the Stitching, select either Everyone or Friends. However, to restrict the people from stitching your videos, choose No-one. After you are done selecting, click on the back arrow to save the applied changes.
Part 3: How to Stitch on TikTok?
TikTok keeps giving creators more reasons to continue producing, and fans like us are more committed to continuing to open it. Stitch, a new app functionality from the famous social networking platform, makes things more straightforward than ever for artists to interact with each other.
But, you might be wondering, how to do a stitch on TikTok? Don’t worry; you’ve come to the right place. Here’s how:
Step 1: Launch TikTok and then go to the video that you want to stitch. Select the Share icon, which resembles an arrow. Select the Stitch symbol from the menu that displays, and then wait a few seconds for the video to complete. The lengthier the video is, the more the loading time.
Step 2: When it’s finished, you’ll be sent to a screen where you may take five seconds of the film and use it on your own. To navigate through the movie, use the sliders and the red bars to choose the portion you want. When you’re finished, tap Next.
Step 3: You’ll be sent to TikTok’s normal recording screen. Record the remainder of your TikTok video with all of the features you’re accustomed to utilizing. You may use whatever effects, stickers, texts, voiceovers, or captions you desire. After that, press the Next button.
Step 4: Make a title and hashtags for your TikTok video. You could also choose whether or not these users may Stitch your movie here – hit the toggle switch beside Allow Stitch to turn it off. Following that, hit the Post option, and your stitched video will be uploaded.
Part 4: How to Stitch Any TikTok Video with Filmora Video Editor ?
Before getting started, understand why people opt for Filmora video editor for stitching videos on TikTok when this can be done through the official TikTok application. TikTok app only allows you to stitch a video for up to five seconds which is quite frustrating if you wish to stitch an entire video.
One more reason is that, with TikTok, you cannot stitch the already existing video from the camera roll, which restricts creators from adding the already edited content to the existing video. So, to avoid the above problems, Filmora is used for stitching TikTok videos.
For Win 7 or later (64-bit)
For macOS 10.12 or later
To begin, download the video that you wish to stitch with from TikTok. After, follow the below stepwise guide:
Step 1: Launch the Filmora software on your PC and import the video files by clicking on the File and then Import/Export Media. You can simply drag and drop the videos as well.
Step 2: Drag the clips from the media library to the Timeline’s video track. All video files will be stitched into a single video with no transitions.
Note: To add a transition to the video , go to the Transition tab and drop the desired transition to the junction of two clips.
Step 3: Now, preview the stitched video and, when finished, click the Export option to save numerous video segments to a single file. Choose any format from the Format tab’s list.
Part 5: FAQs About TikTok Video Stitch
1. Can you do a Stitch on TikTok with a video from your Camera Roll?
Unfortunately, you cannot utilize a video from your Camera Roll in a Stitch at the time of this writing. So, whatever your reaction to a Stitch is, you must record 100% unique footage shot with the TikTok camera. However, you may download the video first and then stitch it with some third-party software such as Filmora.
2. Can you stitch longer than 5 seconds?
No, it is not possible to stitch a video for longer than five seconds using the built-in Stitching feature of the TikTok app. But this can be done by stitching the videos using third-party applications and software.
3. How do I see TikTok stitches?
Users who want to view as many stitches as possible can do it by browsing for them on the app. You must first browse to Discover, and from there to the search box. Then type #Stitch @username, where the username is the name of the account from which you wish to view stitches.
4. TikTok Stitch option not showing. How to fix it?
Users may choose whether or not someone else can Stitch their work in their settings. The option may be found under the Settings and Privacy tab, where users can activate or uncheck Stitch for all videos. So, if the Stitch option is not showing, the user may have disabled the Stitch option.
Conclusion
The Stitch feature is an excellent way to continue the discussion with your videos. You may leave comments on popular content on the site. Most importantly, it may be a fun method to generate material different from what you usually publish. And since you know How to Stitch on TikTok after reading this article, stitch the videos today and create unique content!
Weaving a Story in Your TikTok Closing Moment
If you’re just getting started on TikTok, you might be wondering why people bother with TikTok outros. After all, they’re just a few seconds of a clip at the end of your videos. Why not just let the video end and move on?
Well, TikTok outros are actually a really important part of the platform. They’re a great way to promote your other social media platforms, give your viewers a call to action, or just show off your personality.
In this article, we’ll show you how to create an outro for TikTok that is sure to leave an ever-lasting impression on those watching your content. In the end, we’ll recommend the best video editors that you can use to make your videos engaging by creating the perfect outros every time.
Part 1. Basic Things You Should Know About the Outro in a Video
The outro is the last section of the video where the credits are displayed, such as the name of the creator, the date the video was created, and any other relevant information.
An outro is a good chance to thank your viewers for watching, promote your other videos or social channels, and maybe even sneak in a call-to-action.
Basically, the outro is the last thing your viewers will see, so it’s important to make it count!

Elements of an Outro
Here are a few basic elements to include in your outro to keep people engaged:
- Subscription: Make it easy for people to subscribe to your TikTok account so they can automatically get new content as soon as it’s released. Include a call-to-action at the end of each video, telling people how they can subscribe and get the latest content.
- The Next Video to Watch: If you have other episodes/parts of your TikTok videos, let people know what to expect next. This will give them a reason to come back for more.
- Your Social Media Channels: Let people know where they can find you on other social media platforms so they can connect with you outside of TikTok. This is a great way to build relationships with your viewers.
- Use Stunning Visuals: Usually, viewers skip outros just like any movie credits showing on a black screen with names on it. However, if you try to create a short TikTok outro with stunning visuals, impressive background sound, and a bit of flair, you are bound to get more followers.
How To Make an Advanced Good Outro?
If you want your TikTok video to go viral, you are required to have a good outro, meaning that you need to have a format that is consistent with the main body of your video, a length that is appropriate, and a call to action that is effective.
To create a good outro for your TikTok, follow the below tips:
- Make sure that your outro is in the same format as the rest of your TikTok video. This means that if your TikTok is mainly conversation, your outro should be as well.
- Keep your outro short and sweet because you don’t want to bore your listeners with a long one. The ideal outro duration should not be more than 15 to 20 seconds.
- Your outro should include a call to action. This could be something like asking your listeners to subscribe to your TikTok, follow, and share your content.
- Make your outros visually appealing and make use of colors and/or patterns that are pleasing to the eye.
- Add positive words and phrases to your outros to have a good impact on your viewers.
- Use branding elements like your logo or channel name.
Part 2. An Excellent Video Editor for Your TikTok Adventure
While popular culture and many influencers might have you believe that TikTok is all about kids lip-syncing to pop songs, there’s so much more to this social media platform. Recently, it has become a powerful marketing tool for small to mid-sized businesses.
The best way to use TikTok’s platform for marketing is to create engaging outros for your videos. For this, you’ll need video editing software like Filmora and a little creative mind. With this program, you can easily add text, music, and effects to your TikTok clips to make them truly stand out.
Below are some features of Filmora software:
- Built-in music library.
- Easy to use even for novice users.
- Numerous effects and a color tuning tool.
- Noise removal and an audio equalizer.
- 4k video editing support
- Audio mixer and video stabilization.
- Speed ramping and GIF support.
Follow the instructions below to create some great outros for your TikTok account using the Filmora software:
Step1 First, launch a browser on your PC, visit the official Wondershare Filmora website and download the software version for your Mac or Windows operating system.
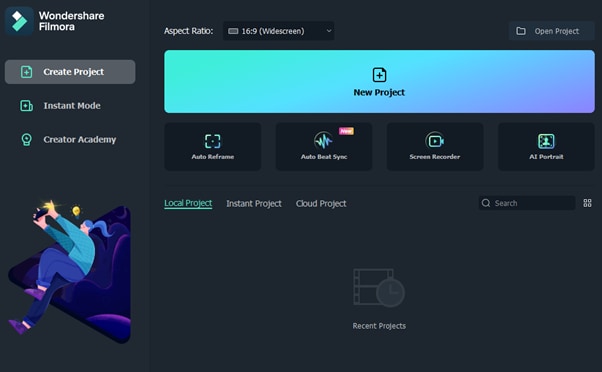
Step2 Install the software on your PC, launch it, click the New Project option on the main dashboard, and use the “Click here to import Media” option or drag and drop your file to import it.
Step3 Drag your video and drop it in the Timeline to start the editing process. Now, add photos, effects, titles, and music to your TikTok outro clip in the end. You can also apply transitions between your video clips.
Step4 Review your video and make the necessary outro adjustments in the Timeline. Finally, click the “Export” option and save the video on your mobile device and upload it on TikTok afterward.
Part 3. A Bonus Recommendation: TikTok Outro Online Makers
Although Filmora is one of the best desktop video editors to create TikTok outros on your Windows or Mac computer, there are several other great online editors to make a quick outro without hiring a costly video production service.
To know more about these editors, read Best 10 TikTok Video Editors to Make a TikTok Video [Online/Windows/PC] .
Conclusion
To become a TikTok sensation overnight, you need to create videos that stand out from the rest. You can achieve this by having compelling intros and outros.
In this article, we’ve provided a detailed guide on how to create an outro for TikTok using Filmora software. We’ve also explained what a good outro is and its basic elements to help you understand the process well.
So, all you need is a strong editing app, a creative mind, and user-friendly software to add an outro to your TikTok videos that will make them even more engaging and entertaining.
Free Download For Win 7 or later(64-bit)
Free Download For macOS 10.14 or later
Below are some features of Filmora software:
- Built-in music library.
- Easy to use even for novice users.
- Numerous effects and a color tuning tool.
- Noise removal and an audio equalizer.
- 4k video editing support
- Audio mixer and video stabilization.
- Speed ramping and GIF support.
Follow the instructions below to create some great outros for your TikTok account using the Filmora software:
Step1 First, launch a browser on your PC, visit the official Wondershare Filmora website and download the software version for your Mac or Windows operating system.
Step2 Install the software on your PC, launch it, click the New Project option on the main dashboard, and use the “Click here to import Media” option or drag and drop your file to import it.
Step3 Drag your video and drop it in the Timeline to start the editing process. Now, add photos, effects, titles, and music to your TikTok outro clip in the end. You can also apply transitions between your video clips.
Step4 Review your video and make the necessary outro adjustments in the Timeline. Finally, click the “Export” option and save the video on your mobile device and upload it on TikTok afterward.
Part 3. A Bonus Recommendation: TikTok Outro Online Makers
Although Filmora is one of the best desktop video editors to create TikTok outros on your Windows or Mac computer, there are several other great online editors to make a quick outro without hiring a costly video production service.
To know more about these editors, read Best 10 TikTok Video Editors to Make a TikTok Video [Online/Windows/PC] .
Conclusion
To become a TikTok sensation overnight, you need to create videos that stand out from the rest. You can achieve this by having compelling intros and outros.
In this article, we’ve provided a detailed guide on how to create an outro for TikTok using Filmora software. We’ve also explained what a good outro is and its basic elements to help you understand the process well.
So, all you need is a strong editing app, a creative mind, and user-friendly software to add an outro to your TikTok videos that will make them even more engaging and entertaining.
Free Download For Win 7 or later(64-bit)
Free Download For macOS 10.14 or later
Also read:
- [New] 2024 Approved A Visual Guide to Subtitling Techniques for Effective Dialogue Placement
- [New] 2024 Approved How to Disconnect Permanently From the TikTok Community
- [New] In 2024, Mastering Noise Elimination in Audacity
- [Updated] 2024 Approved Quick-Load Techniques to Enhance TikTok Videography
- [Updated] In 2024, How to Craft a Unique Identifier for Your TikTok Stream
- [Updated] IPhone Strategies Access TikTok Videos without Markers
- [Updated] Unbeatable Bike Sims Showcase
- 2024 Approved 12 Top-Tier Cameras That Will Transform Your Vlogging Experience
- 2024 Approved 7 Leading Free TikTok Audio Tools for Seamless MP3 Conversion
- Aesir Rebellion Skies of Valhalla for 2024
- Fostering Fandom Creating Jujutsu Kaisen Content for TikTok
- From Ordinary to Spectacular Making Wow-Worthy TikTok Videos with Templates for 2024
- Install Official HP DeskJet 2652 Printer Drivers for Modern Windows Systems (11/10/8/7)
- Learn the Ultimate Snap Sharing Trick Today
- Precision and Persuasion Crafting Content That Sticks on Reddit for 2024
- Solving the Dark Void: A Guide to Resolving LoL Black Screen Issues
- Ultimate Fixes for Stuttering in Half-Life: Alyx - Boost Your Gaming PC's Performance Now!
- Unlock Your Vivo G2s Potential The Top 20 Lock Screen Apps You Need to Try
- ポータブルHDDから失われた情報を完全復元する方法を解説!
- Title: [New] Needlework Networking Sewing Skills in Social Spaces (TikTok)
- Author: Stephen
- Created at : 2024-12-02 19:47:21
- Updated at : 2024-12-10 01:13:25
- Link: https://tiktok-video-recordings.techidaily.com/new-needlework-networking-sewing-skills-in-social-spaces-tiktok/
- License: This work is licensed under CC BY-NC-SA 4.0.