
!["[Updated] In 2024, How to Produce Silent Soundtracks The Power of Audacity's De-Noising Tools"](https://www.lifewire.com/thmb/RfgcGTJL-PorhS2JNdG5O7AgNzg=/400x300/filters:no_upscale():max_bytes(150000):strip_icc()/oneplus12splash-74d8e370f72543c0bef9d815cebbb6ec.jpg)
"[Updated] In 2024, How to Produce Silent Soundtracks The Power of Audacity's De-Noising Tools"
How to Produce Silent Soundtracks: The Power of Audacity’s De-Noising Tools
The most frequent request you’ll get from video makers is to eliminate irritating noises like rumbling or humming from an original clip. Almost all of the time, capturing high-quality audio during filming is challenging since the conversation is often hard to hear or is made unclear due to surrounding noises, such as the dreadful air conditioners or fans.
To get rid of all these awful noises, this Audacity Noise Reduction feature will serve you a significant purpose in removing unwanted background noise for your future videos. Without further ado, let’s get started!
In this article
01 Things You Need to Prepare for Background Noise Reduction
02 How to Remove Background Noise in Audacity?
03 Why is Audacity Noise Reduction Not Working?
04 How to Prevent Background Noise in Audio Recording?
05 How to Remove Background Noise in Filmora?
Part 1: Things You Need to Prepare for Background Noise Reduction
Here are few things that you need to consider before you apply the noise reduction to your clips:
1. Noise Sample
A decent sample of the noise you wish to eliminate is perhaps the most crucial aspect of the Audacity remove noise procedure.
This will be used by Audacity to understand the noise and build a noise profile. The noise recording should last for a fair amount of time and be devoid of any other noises.
2. Avoid Copy Pasting Tiny Noise Section in Your Spoken Phrases
When you have a tiny part of noise between your stated words on your audio, please don’t copy/paste it to make a more significant piece of sound for Audacity to examine.
You would not be supplying Audacity with any more information that will help it generate a decent noise profile. The noise profile is what enables Audacity to tell the difference between speech and noise.
3. Minimum 2048 Data Samples Required
To build a noise profile, the Noise Reduction function requires a minimum of 2048 sample data. An audio file with a sampling frequency of 44.1kHz is roughly five hundredths of a second.
Note that this is the minor sound level that Audacity needs to generate a noise profile; however, should you supply a larger sample of the noise, Audacity can typically perform a great job of producing a suitable noise profile. As a result, attempt to capture a few seconds of background noises wherever possible.
4. Establish Recording Level and Record “Silence”
Setting your audio volume and capturing some “quiet” prior to speaking is the best way to achieve this. Instead, when you’ve finished talking, keep your camera/recorder going for a few moments.
Don’t move or create any sounds while capturing the background noises, and keep an ear open for any other noises. You only need to capture the ambient noise for a few moments; two to five seconds will suffice.
Part 2: How to Remove Background Noise in Audacity on Windows and Mac?
Whether you are using Windows or macOS, we will show you a step-by-step process to achieve your results using both software in this part of Audacity remove background music guide.
Remove background noise in Audacity on Windows
Step 1: On your recording, select a few moments of sound. Any segment of noise that incorporates other noises should be avoided.

Step 2: From the Effect menu, select Noise Reduction.

Step 3: Select the Get Noise Profile option whenever the Noise Reduction effect screen appears.

Note: Choose whether to implement the noise removal to the entire waveforms or only a portion of it.
Step 4: To access the Noise Reduction effects window, go to Effects > Noise Reduction. Raise the level of noise reduction progressively while previewing the result.

Step 5: Head over to the File section to Export and Save the result. Audacity does not save sound clips when you select Save Project; instead, you must choose Export. Select the file type you want to store and the place wherever you can save it. Select Save after giving the File Name.

Remove background noise in Audacity on Mac
Step 1: Create a room tone-containing audio file. When you don’t have a separate track for room tone, use a recording with a few moments of quiet in it. Click-and-drag to select a segment with a few minutes of silence using the Selection Tool.

Step 2: Select Noise Reduction from the Effects tab. Select the Get Noise Profile tab in the new tab under Step 1. The screen will shut, and Audacity will take noise profile samples of the indicated area.

Step 3: Click-and-drag to select the whole file, which requires noise reduction with the Selection Tool. To re-open the function, go to the Effect tab and pick Noise Reduction. Make modifications to the following parameters under Step 2:
- Reduce and Residue
- Frequency Smoothing (bands)
- Sensitivity
- Noise Reduction

Step 4: To listen to how the chosen file will look with the selected parameters, select Preview. Re-adjust until you have a sound noise reduction with no interference. When you’re finished, select Reduce and click OK.
Part 3: Why is Audacity Noise Reduction Not Working?
It’s possible that the Noise Reduction function isn’t letting you mop up your recording since your audio isn’t appropriate for it. The disturbance must be continuous, not random or fluctuating, to work for Audacity’s Noise Reduction function.
For example, the Noise Reduction function will not assist if your audio was made in a busy environment with unique noises such as background chatter, random traffic noises, or in an exhibition space or museum. The Noise Reduction feature in Audacity isn’t meant to cope with that kind of distortion. You’ll need to alter your recording approach if you’re capturing voice in either of those situations.
Under the following situations, the Audacity Noise Reduction function might underperform.
- Particular noise in the background, including traffic or people.
- When the harmonics of the sound and voice are comparable.
- There is sound variance where there is fluctuation in the noise.
- The volume of the voice is comparable to or lower than that of the background noise.
- When the noise is irregular or changeable rather than continuous.
- The loudness is deafening.
- The sound is a single click or pop.
Part 4: How to Prevent Background Noise in Audio Recording?
Although Audacity allows eliminating noise very simply, it is still an additional level that takes time to refine your podcast production. These pointers can help you avoid the necessity for noise reduction and cut down on the amount of time you spend processing.
1. Reduce the Computer Fan Noise
Whenever computers become too heated, they can produce a lot of noise. You may limit the amount of software that runs and position your mic away from the keyboard to help lessen this impact and avoid the fan from coming on.
However, even if you observe all of these guidelines, undesired recording sounds may still appear in your program. Fortunately, contemporary software makes this problem quite simple to resolve.
2. Reduce the Gain and Get Close to the Mic
Reduce the gain (sensitivity of the microphone) and go nearer to it. Talking straight into the microphone won’t distort your audio if you reduce the gain, and that would assist your microphone in concentrating on scooping up your voice’s tone.
Bonus Tip: Set your recorder’s (or DAW’s) sensitivity such that your speech peaks between -12 and -10db.
3. Utilize a Versatile Microphone
Condenser and dynamic microphones are the two most common types of podcast microphones. Condenser microphones are significantly more sensitive instruments meant to take up average atmospheric noise, whereas dynamic microphones have a narrower frequency range, picking up fewer ambient noises.
4. Optimize Your Recording Environment
The most significant and most crucial aspect of your podcasts’ sound quality is where you capture it. To optimize your personal podcasting space, we recommend choosing a peaceful, compact area away from HVAC systems, vehicles, external hard drives, background sound, motors, and other distractions. You may also increase the tone of your room by using natural sound absorbents such as curtains, rugs, carpets, and sofas.
Part 5: How to Remove Background Noise in Filmora?
Although there is a lot of software available to eliminate ambient noise, we highly suggest Wondershare Filmora Video Editor to edit audio and video in one place.
In addition to the standard audio editing capabilities, the recently redesigned Filmora currently includes enhanced waveforms, volume Keyframing , peak metering, and audio transitions, giving you a better audio editing interface.
For Win 7 or later (64-bit)
For macOS 10.12 or later
Filmora Video Editor will quickly remove ambient sound from both sound/video. You may also remove the sound from the video with this simple video editor, use the Audio Equalizer or Audio Mixer functions to modify the audio further, and then Export and save the audio in an Mp3 file. Here are the detailed steps:
Step 1: In the Wondershare Filmora Timeline menu, Import your footage. Trim the footage after previewing it and deleting the sections you don’t want to retain.

Step 2: To eliminate the ambient noise immediately, double-click on the video file, and go to the Audio panel to select the Remove Background Noise option. You will find that the background noise is removed automatically.

Step 3: After checking the results, select Export to download the noise-reduced clip to your desktop or upload it immediately to YouTube or Vimeo.

Conclusion
Well, there you have it. In this Audacity Remove Background Noise guide, we have reviewed every possible method you can adopt to get rid of the unnecessary background noise in the Audacity. And if the desired results are still not achieved, we highly recommend using the Wondershare Filmora editing software. Not only will it help you remove the unwanted ambient noise, but it will also allow you to customize your audio or video file further.
02 How to Remove Background Noise in Audacity?
03 Why is Audacity Noise Reduction Not Working?
04 How to Prevent Background Noise in Audio Recording?
05 How to Remove Background Noise in Filmora?
Part 1: Things You Need to Prepare for Background Noise Reduction
Here are few things that you need to consider before you apply the noise reduction to your clips:
1. Noise Sample
A decent sample of the noise you wish to eliminate is perhaps the most crucial aspect of the Audacity remove noise procedure.
This will be used by Audacity to understand the noise and build a noise profile. The noise recording should last for a fair amount of time and be devoid of any other noises.
2. Avoid Copy Pasting Tiny Noise Section in Your Spoken Phrases
When you have a tiny part of noise between your stated words on your audio, please don’t copy/paste it to make a more significant piece of sound for Audacity to examine.
You would not be supplying Audacity with any more information that will help it generate a decent noise profile. The noise profile is what enables Audacity to tell the difference between speech and noise.
3. Minimum 2048 Data Samples Required
To build a noise profile, the Noise Reduction function requires a minimum of 2048 sample data. An audio file with a sampling frequency of 44.1kHz is roughly five hundredths of a second.
Note that this is the minor sound level that Audacity needs to generate a noise profile; however, should you supply a larger sample of the noise, Audacity can typically perform a great job of producing a suitable noise profile. As a result, attempt to capture a few seconds of background noises wherever possible.
4. Establish Recording Level and Record “Silence”
Setting your audio volume and capturing some “quiet” prior to speaking is the best way to achieve this. Instead, when you’ve finished talking, keep your camera/recorder going for a few moments.
Don’t move or create any sounds while capturing the background noises, and keep an ear open for any other noises. You only need to capture the ambient noise for a few moments; two to five seconds will suffice.
Part 2: How to Remove Background Noise in Audacity on Windows and Mac?
Whether you are using Windows or macOS, we will show you a step-by-step process to achieve your results using both software in this part of Audacity remove background music guide.
Remove background noise in Audacity on Windows
Step 1: On your recording, select a few moments of sound. Any segment of noise that incorporates other noises should be avoided.
Step 2: From the Effect menu, select Noise Reduction.
Step 3: Select the Get Noise Profile option whenever the Noise Reduction effect screen appears.
Note: Choose whether to implement the noise removal to the entire waveforms or only a portion of it.
Step 4: To access the Noise Reduction effects window, go to Effects > Noise Reduction. Raise the level of noise reduction progressively while previewing the result.
Step 5: Head over to the File section to Export and Save the result. Audacity does not save sound clips when you select Save Project; instead, you must choose Export. Select the file type you want to store and the place wherever you can save it. Select Save after giving the File Name.
Remove background noise in Audacity on Mac
Step 1: Create a room tone-containing audio file. When you don’t have a separate track for room tone, use a recording with a few moments of quiet in it. Click-and-drag to select a segment with a few minutes of silence using the Selection Tool.
Step 2: Select Noise Reduction from the Effects tab. Select the Get Noise Profile tab in the new tab under Step 1. The screen will shut, and Audacity will take noise profile samples of the indicated area.
Step 3: Click-and-drag to select the whole file, which requires noise reduction with the Selection Tool. To re-open the function, go to the Effect tab and pick Noise Reduction. Make modifications to the following parameters under Step 2:
- Reduce and Residue
- Frequency Smoothing (bands)
- Sensitivity
- Noise Reduction
Step 4: To listen to how the chosen file will look with the selected parameters, select Preview. Re-adjust until you have a sound noise reduction with no interference. When you’re finished, select Reduce and click OK.
Part 3: Why is Audacity Noise Reduction Not Working?
It’s possible that the Noise Reduction function isn’t letting you mop up your recording since your audio isn’t appropriate for it. The disturbance must be continuous, not random or fluctuating, to work for Audacity’s Noise Reduction function.
For example, the Noise Reduction function will not assist if your audio was made in a busy environment with unique noises such as background chatter, random traffic noises, or in an exhibition space or museum. The Noise Reduction feature in Audacity isn’t meant to cope with that kind of distortion. You’ll need to alter your recording approach if you’re capturing voice in either of those situations.
Under the following situations, the Audacity Noise Reduction function might underperform.
- Particular noise in the background, including traffic or people.
- When the harmonics of the sound and voice are comparable.
- There is sound variance where there is fluctuation in the noise.
- The volume of the voice is comparable to or lower than that of the background noise.
- When the noise is irregular or changeable rather than continuous.
- The loudness is deafening.
- The sound is a single click or pop.
Part 4: How to Prevent Background Noise in Audio Recording?
Although Audacity allows eliminating noise very simply, it is still an additional level that takes time to refine your podcast production. These pointers can help you avoid the necessity for noise reduction and cut down on the amount of time you spend processing.
1. Reduce the Computer Fan Noise
Whenever computers become too heated, they can produce a lot of noise. You may limit the amount of software that runs and position your mic away from the keyboard to help lessen this impact and avoid the fan from coming on.
However, even if you observe all of these guidelines, undesired recording sounds may still appear in your program. Fortunately, contemporary software makes this problem quite simple to resolve.
2. Reduce the Gain and Get Close to the Mic
Reduce the gain (sensitivity of the microphone) and go nearer to it. Talking straight into the microphone won’t distort your audio if you reduce the gain, and that would assist your microphone in concentrating on scooping up your voice’s tone.
Bonus Tip: Set your recorder’s (or DAW’s) sensitivity such that your speech peaks between -12 and -10db.
3. Utilize a Versatile Microphone
Condenser and dynamic microphones are the two most common types of podcast microphones. Condenser microphones are significantly more sensitive instruments meant to take up average atmospheric noise, whereas dynamic microphones have a narrower frequency range, picking up fewer ambient noises.
4. Optimize Your Recording Environment
The most significant and most crucial aspect of your podcasts’ sound quality is where you capture it. To optimize your personal podcasting space, we recommend choosing a peaceful, compact area away from HVAC systems, vehicles, external hard drives, background sound, motors, and other distractions. You may also increase the tone of your room by using natural sound absorbents such as curtains, rugs, carpets, and sofas.
Part 5: How to Remove Background Noise in Filmora?
Although there is a lot of software available to eliminate ambient noise, we highly suggest Wondershare Filmora Video Editor to edit audio and video in one place.
In addition to the standard audio editing capabilities, the recently redesigned Filmora currently includes enhanced waveforms, volume Keyframing , peak metering, and audio transitions, giving you a better audio editing interface.
For Win 7 or later (64-bit)
For macOS 10.12 or later
Filmora Video Editor will quickly remove ambient sound from both sound/video. You may also remove the sound from the video with this simple video editor, use the Audio Equalizer or Audio Mixer functions to modify the audio further, and then Export and save the audio in an Mp3 file. Here are the detailed steps:
Step 1: In the Wondershare Filmora Timeline menu, Import your footage. Trim the footage after previewing it and deleting the sections you don’t want to retain.
Step 2: To eliminate the ambient noise immediately, double-click on the video file, and go to the Audio panel to select the Remove Background Noise option. You will find that the background noise is removed automatically.
Step 3: After checking the results, select Export to download the noise-reduced clip to your desktop or upload it immediately to YouTube or Vimeo.
Conclusion
Well, there you have it. In this Audacity Remove Background Noise guide, we have reviewed every possible method you can adopt to get rid of the unnecessary background noise in the Audacity. And if the desired results are still not achieved, we highly recommend using the Wondershare Filmora editing software. Not only will it help you remove the unwanted ambient noise, but it will also allow you to customize your audio or video file further.
The Unforgettable Soundtrack: 2024’S Most Haunting TikTok Tracks
Top 10 Tik Tok Catchy Songs of 2024 that are Stuck in Your Head

Shanoon Cox
Mar 27, 2024• Proven solutions
“Which Tik Tok song is famous?”
The above is one of the frequently asked questions on Google by fans of Tik Tok. Even though Tik Tok got launched merely three years ago, it gained a worth noting popularity in a short time. Being one of the reliable platforms, many use it for song promotions and even create original Tik Tok songs. Tik Tok allows editing, watching, sharing, and saving those videos. Meanwhile, we noticed that top TikTok songs are also getting real-time engagement as other content. People are finding them lovely, helpful, motivating, and super entertaining.
Well, we are talking about the list of songs that stuck in your head. We’re here to keep you updated on the most popular TikTok songs of 2024 that are super attractive to ears. Maybe you won’t love all songs, but their ear-catchy and lovely voice feature will make you sway. Teens love such entertainment as it is available with reliability and real-time user access. Even if you perform a duet or dance on such music, there are great chances that your video will rank high.
Top 10 Catchy Tik Tok songs
Let’s hear the best TikTok songs in our top 10 list given below.
1. Dance Monkey
Dance Monkey is a song that gets up to real fame and also makes you hop around. Many Tik tokers use an upbeat and catchy tune like Dance Monkey with perfect background music. The users watching various videos with this song found them a kind of addicted towards it. No matter how different every video will be, this song can get you an ear-struck. The popular videos with this music are dancing, horseback riding, and a video by ‘Tones and I’ with a theme of funny cupcake crème.
2. This is for Rachael
This song gained considerable popularity on TikTok. The song originates from Twitter’s 2018 clip and is still a hit on the app. This specific video, the maker has shown fantastic creativity right from fish transformation to a human. They have used some software also other than TikTok’s filter.
3. Intentions
Sung by Justin Bieber, Intentions song is just heart touching. Even though its lyrics mainly tell you about wife relationships, people have taken this a base and post tons of videos on TikTok. The girl also shows a kind of excitement factor in the video. Overall, it comes out to be a cool video that we would like to share with you in such sweet background music.
4. Shooting Stars
Shooting stars got shot in such a funny video. However, it gives you both the pleasure of the presence of its beautiful tone and funny moments. The song receives damn hits on TikTok in recent years. Although released in 2008, we are not able to ignore its fame. This hit song by Australian band Bag Raisers is also used by many tik tokers to grab a little publicity from it via dancing, acting funny, or doing other entertainment.
5. All I want for Christmas is You
Nose painting with the song ‘All I want for Christmas is you’ is a very heart-touching video. We got positive vibes and other good things in such a beautiful song. Just like others, it is also a famous song written by American singer and songwriter Mariah Carey. And, this particular song album is the lead single from her other album Merry Christmas.
6. Bad Guy – Billie Eilish
Bad Guy song by Billie Eilish has also seen some fame stuff on TikTok. And, we found this girl’s video on top ranking. She is performing just like the queen of chilly hits. Yet, there is some slow pace in its growth on the platform, but tik tokers love to make duet or to pair with this song album short video. Most of the users have also get it in artistic, funny, drawing, painting, makeup, and other kinds of videos.
7. Daddy (feat. Rich The Kid)
Blueface baby! Yeah, this trending rapper got some other hits that may look impossible to many to sing along. However, if you get that, the song is just great for dancing or lip-syncing. He is known as Blueface from his famous song ‘Thotiana,’ but he is again with more hit albums. And, as usual, tik tokers are gaining for this TikTok song. Everyone wants that beat and signature sound. Maybe, you also find it challenging to resist listening to this song.
8. Mo Bamba
Mo Bamba is the love of everyone, we must say! Sheck Wes, the famous American rapper, sung this. And there are so many videos available on this particular song. We loved this TikTok video as it says, ‘throwback to Mo Bamba dancing to Mo Bamba because this is perfectly meta.’ It’s after a sports event that these guys are having fun with the song, which is cool and awesome.
9. Payphone
The song called Payphone is sung directly from the heart. After listening to it, you feel relaxed and happy. The performers all just look so natural. The famous pop-rock band of America Maroon 5 sung this on 16th April 2012. It also features Wiz Khalifa, an American rapper. Here, this kid is showing dance moves on the song. Well, he has given some funny bloopers also. That’s looking good btw!
10. Sicko Mode
American rapper Travis Scott also sang Sicko Mode. It got so much love from fans that even the TikTok got significantly stuffed with this hit album. We found this TikTok song where Travis Scott himself is singing on stage and just rocking. The stage performance looked magnificent, where everyone got the adrenaline rush to sing along.
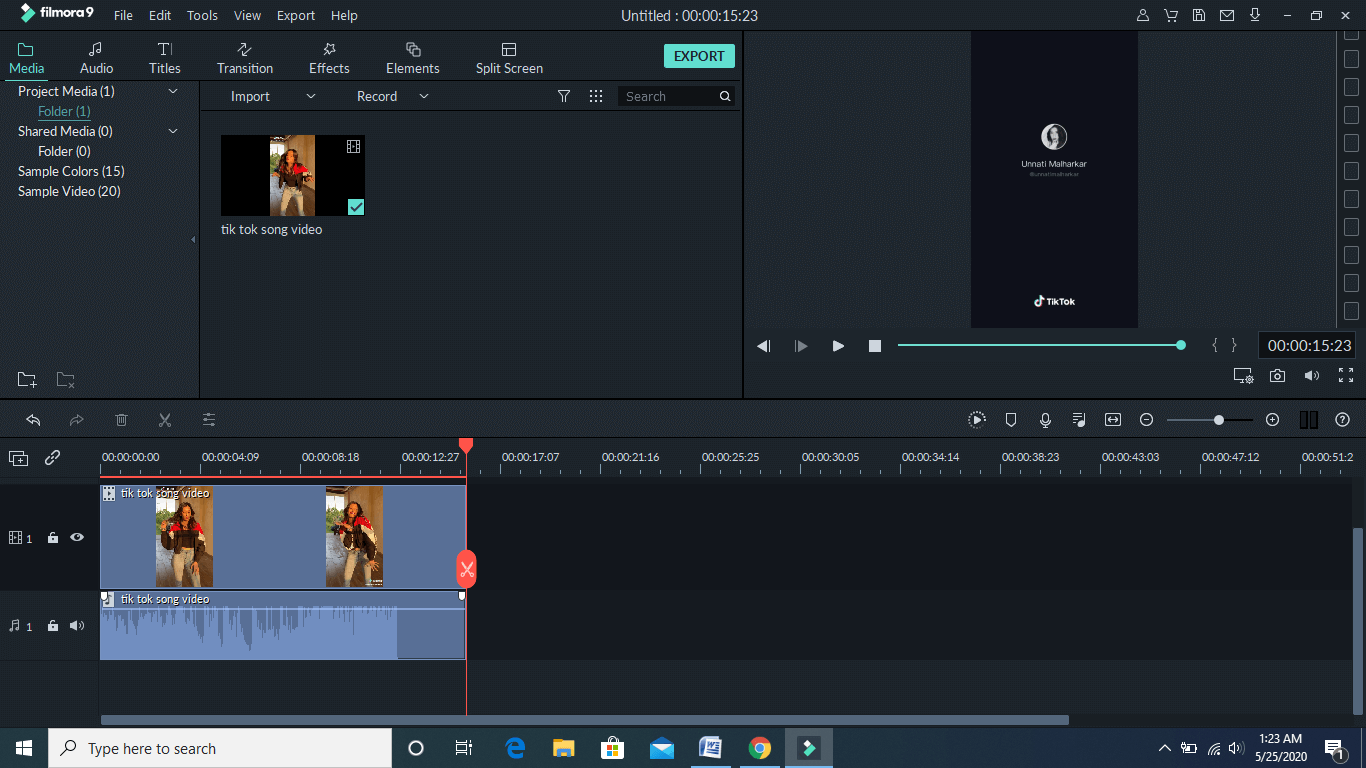
How to download music from TikTok?
Want to download the best TikTok songs? If yes, then you have to use specific software that is reliable and quick. For inspiration, go for Filmora, which is the most basic version of Filmora by Wondershare. Wondershare has other advanced versions also such as Filmora Pro. However, to download TikTok songs, we recommend you to use Filmora. All kinds of video editing solutions are available here, right from basic editing to advanced changes.


Let’s head towards a step-by-step tutorial on downloading music from TikTok.
Step 1: Launch Filmora
First and foremost, you have to launch the software after clicking on the Download tab. Then, you will need to install the software. After granting specific permissions, let it begin on your PC.
Step 2: Download your favorite TikTok video
Go to TikTok, search your favorite song, and download any particular video on it. It’s pretty simple to download from there. If you’re on a laptop, you can right-click the video. Else, you can simply long-press the video on a smartphone and hit Save Video.

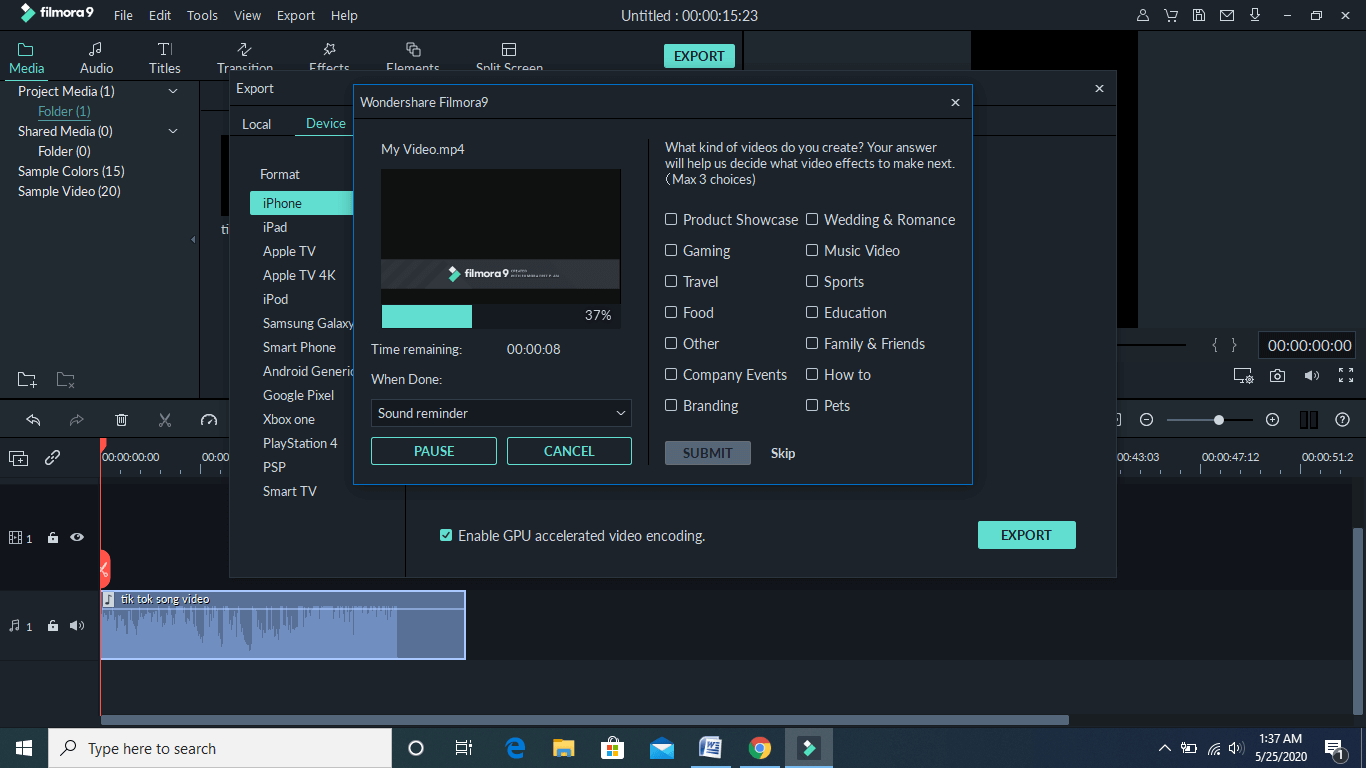
Step 3: Import tik tok video
We downloaded a video by a girl on the song ‘All I want for Christmas is You.’ Let’s extract its audio with the help of the Filmora Audio Extraction feature.
Go to Media> +Drop icon button to import the TikTok song video.

Step 4: Add Project to timeline
Now, click on the imported video and add it to the timeline. Right-click video in the timeline and click the Detach Audio button.

The audio will now get detached and show in the panel right below the video. To use this music, you can delete by a right-click and adjust this audio in any of your favorite videos.
After you extract the video, take it to the main panel, and hit the Export button. Then, click Export to Device.
You will be able to see the progress of the TikTok song in the new window, as shown below.
Conclusion
So, this is how you can download the top 10 TikTok songs of 2024. Next time, if you like any TikTok song, make sure to download it with the help of the software we mentioned. Then, it would be super easy for you to remember those albums and have fun.
Shanoon Cox
Shanoon Cox is a writer and a lover of all things video.
Follow @Shanoon Cox
Shanoon Cox
Mar 27, 2024• Proven solutions
“Which Tik Tok song is famous?”
The above is one of the frequently asked questions on Google by fans of Tik Tok. Even though Tik Tok got launched merely three years ago, it gained a worth noting popularity in a short time. Being one of the reliable platforms, many use it for song promotions and even create original Tik Tok songs. Tik Tok allows editing, watching, sharing, and saving those videos. Meanwhile, we noticed that top TikTok songs are also getting real-time engagement as other content. People are finding them lovely, helpful, motivating, and super entertaining.
Well, we are talking about the list of songs that stuck in your head. We’re here to keep you updated on the most popular TikTok songs of 2024 that are super attractive to ears. Maybe you won’t love all songs, but their ear-catchy and lovely voice feature will make you sway. Teens love such entertainment as it is available with reliability and real-time user access. Even if you perform a duet or dance on such music, there are great chances that your video will rank high.
Top 10 Catchy Tik Tok songs
Let’s hear the best TikTok songs in our top 10 list given below.
1. Dance Monkey
Dance Monkey is a song that gets up to real fame and also makes you hop around. Many Tik tokers use an upbeat and catchy tune like Dance Monkey with perfect background music. The users watching various videos with this song found them a kind of addicted towards it. No matter how different every video will be, this song can get you an ear-struck. The popular videos with this music are dancing, horseback riding, and a video by ‘Tones and I’ with a theme of funny cupcake crème.
2. This is for Rachael
This song gained considerable popularity on TikTok. The song originates from Twitter’s 2018 clip and is still a hit on the app. This specific video, the maker has shown fantastic creativity right from fish transformation to a human. They have used some software also other than TikTok’s filter.
3. Intentions
Sung by Justin Bieber, Intentions song is just heart touching. Even though its lyrics mainly tell you about wife relationships, people have taken this a base and post tons of videos on TikTok. The girl also shows a kind of excitement factor in the video. Overall, it comes out to be a cool video that we would like to share with you in such sweet background music.
4. Shooting Stars
Shooting stars got shot in such a funny video. However, it gives you both the pleasure of the presence of its beautiful tone and funny moments. The song receives damn hits on TikTok in recent years. Although released in 2008, we are not able to ignore its fame. This hit song by Australian band Bag Raisers is also used by many tik tokers to grab a little publicity from it via dancing, acting funny, or doing other entertainment.
5. All I want for Christmas is You
Nose painting with the song ‘All I want for Christmas is you’ is a very heart-touching video. We got positive vibes and other good things in such a beautiful song. Just like others, it is also a famous song written by American singer and songwriter Mariah Carey. And, this particular song album is the lead single from her other album Merry Christmas.
6. Bad Guy – Billie Eilish
Bad Guy song by Billie Eilish has also seen some fame stuff on TikTok. And, we found this girl’s video on top ranking. She is performing just like the queen of chilly hits. Yet, there is some slow pace in its growth on the platform, but tik tokers love to make duet or to pair with this song album short video. Most of the users have also get it in artistic, funny, drawing, painting, makeup, and other kinds of videos.
7. Daddy (feat. Rich The Kid)
Blueface baby! Yeah, this trending rapper got some other hits that may look impossible to many to sing along. However, if you get that, the song is just great for dancing or lip-syncing. He is known as Blueface from his famous song ‘Thotiana,’ but he is again with more hit albums. And, as usual, tik tokers are gaining for this TikTok song. Everyone wants that beat and signature sound. Maybe, you also find it challenging to resist listening to this song.
8. Mo Bamba
Mo Bamba is the love of everyone, we must say! Sheck Wes, the famous American rapper, sung this. And there are so many videos available on this particular song. We loved this TikTok video as it says, ‘throwback to Mo Bamba dancing to Mo Bamba because this is perfectly meta.’ It’s after a sports event that these guys are having fun with the song, which is cool and awesome.
9. Payphone
The song called Payphone is sung directly from the heart. After listening to it, you feel relaxed and happy. The performers all just look so natural. The famous pop-rock band of America Maroon 5 sung this on 16th April 2012. It also features Wiz Khalifa, an American rapper. Here, this kid is showing dance moves on the song. Well, he has given some funny bloopers also. That’s looking good btw!
10. Sicko Mode
American rapper Travis Scott also sang Sicko Mode. It got so much love from fans that even the TikTok got significantly stuffed with this hit album. We found this TikTok song where Travis Scott himself is singing on stage and just rocking. The stage performance looked magnificent, where everyone got the adrenaline rush to sing along.
How to download music from TikTok?
Want to download the best TikTok songs? If yes, then you have to use specific software that is reliable and quick. For inspiration, go for Filmora, which is the most basic version of Filmora by Wondershare. Wondershare has other advanced versions also such as Filmora Pro. However, to download TikTok songs, we recommend you to use Filmora. All kinds of video editing solutions are available here, right from basic editing to advanced changes.
Let’s head towards a step-by-step tutorial on downloading music from TikTok.
Step 1: Launch Filmora
First and foremost, you have to launch the software after clicking on the Download tab. Then, you will need to install the software. After granting specific permissions, let it begin on your PC.
Step 2: Download your favorite TikTok video
Go to TikTok, search your favorite song, and download any particular video on it. It’s pretty simple to download from there. If you’re on a laptop, you can right-click the video. Else, you can simply long-press the video on a smartphone and hit Save Video.
Step 3: Import tik tok video
We downloaded a video by a girl on the song ‘All I want for Christmas is You.’ Let’s extract its audio with the help of the Filmora Audio Extraction feature.
Go to Media> +Drop icon button to import the TikTok song video.
Step 4: Add Project to timeline
Now, click on the imported video and add it to the timeline. Right-click video in the timeline and click the Detach Audio button.
The audio will now get detached and show in the panel right below the video. To use this music, you can delete by a right-click and adjust this audio in any of your favorite videos.
After you extract the video, take it to the main panel, and hit the Export button. Then, click Export to Device.
You will be able to see the progress of the TikTok song in the new window, as shown below.
Conclusion
So, this is how you can download the top 10 TikTok songs of 2024. Next time, if you like any TikTok song, make sure to download it with the help of the software we mentioned. Then, it would be super easy for you to remember those albums and have fun.
Shanoon Cox
Shanoon Cox is a writer and a lover of all things video.
Follow @Shanoon Cox
Also read:
- [Updated] 2024 Approved Unleashing Video Magic on TikTok with Pre-Made Designs
- In 2024, Mastering the Art of Imitation for a Unique and Authentic TikTok Presence
- Top 5 Strategies for Implementing TikTok Video Descriptions for 2024
- [New] 3 Strategies for TikTok Livestreaming From Desktop for 2024
- [Updated] Mastering Visual Communication A Guide to Adding Captions on TikTok for 2024
- [New] Discover the 50 Best-Viewed TikTok Hashtags
- [New] 2024 Approved Move to the Beat The Essential Guide to Mac-Based TikTok Dances
- [Updated] 2024 Approved Achieving Professional-Grade Slow Motions in Your TikTok Content
- The Complete Visual Vocabulary of TikTok Emojis & Icons
- [Updated] In 2024, Joining Live Shows A TikTok Perspective
- [Updated] 2024 Approved Unveiling TikTok's Hidden Emoji Gems Top 7 List
- [New] In 2024, Combatting Common Complications in TikTok Usage
- [Updated] In 2024, The Ultimate Guide to the Best & Secret TikTok Emojis
- Achieve Popularity with TikTok A PC/MAC Guide to Video Sharing for 2024
- [Updated] 2024 Approved The Elite Circle Unveiling Top 10 Gamers on TikTok
- 2024 Approved What's Cooking? 10 Viral Food Scenes on TikTok
- [New] In 2024, TikTok Marketing Strategy Grow Your Business on TikTok
- In 2024, Don't Skip This Week's Hot TikTok Tests
- [New] In 2024, Exploring Leading TikTok GIF Conversion Apps Today
- [Updated] Explore Next-Level TikTok Edits with Simple Background Swapping Techniques for 2024
- [Updated] Perfecting the Aesthetic OOTD TikTok on a Mac for 2024
- [Updated] Efficient Edits Free Mac Apps for Improved TikTok Videos for 2024
- [Updated] Unlock More Views with These TikTok Text Tools of 2023 for 2024
- [Updated] 2024 Approved Relaxation Playlist 20 Sweetest Country Tunes on TikTok
- [New] The Essential Guide to Exceptional TikTok Recordings in Under 156 Characters for 2024
- 2024 Approved Navigating the Vibrancy of TikTok's Anime The Art of Movement and Expression
- [New] In 2024, Authentic TikTok Follower Purchase Guides
- In 2024, Boosting Video Impact on TikTok via Sound Change
- [New] 2024 Approved Best Mobile Video Editing for TikTok Stars
- [New] In 2024, Master the Art of Media Magic Prime TikTok-to-GIF Converters
- [Updated] In 2024, Behind the Scenes Top 7 TikTok Charms and Their Mysterious Counterparts
- Quick Start Downloading and Using TikTok on MacBook
- How to Change Voice on TikTok, In 2024
- [New] The Essentials TikTok's Speed Up Functionality
- 2024 Approved Fostering Connection and Engagement for Brands on TikTok
- Make a Boomerang on Snapchat – A Comprehensive Guide
- TikTok Trends Navigating Copyright Laws for Your Videos
- 2024 Approved Bold Bio Breakthroughs Secrets Revealed for Tripling TikTok Viewership via Filmora
- [New] In 2024, Uniting Voices for Virtual Fame on TikTok
- 2024 Approved Unwind Yourself with These 20 Best Country Songs on TikTok
- How to Fast Forward on TikTok for 2024
- [Updated] Essential Apps for Cleaning TikTok Video Logos
- [Updated] Reimagine Your TikTok Persona Visuals & Text Changes for 2024
- [New] Identifying the Perfect Hashtag for Your TikTok Profile
- [New] 2024 Approved Ideal Badge Erasers Perfect for Mobile Devices & iOS/Android
- Planetary Palate Pleasures Iconic Dishes From Around the Globe for 2024
- [Updated] 2024 Approved Step-By-Step Process to Create Big Heads on Your TikTok Content (3 Methods)
- [New] 2024 Approved The Artisan's Guide to Essential Tools and Techniques in TikTok
- [Updated] 2024 Approved 8 Best Video Call App for Android (More than 4 Participants)
- [Updated] Social Media Savvy Turning Friends Into Customers and Coins
- [New] In 2024, Achieving Perfect Time-Lapses with iOS Devices
- Fix App Not Available in Your Country Play Store Problem on Xiaomi Redmi Note 12 Pro+ 5G | Dr.fone
- New S Best Free AVI Video Rotators A Comprehensive Review
- [Updated] Apex Thrill Racers Our Favorites (5) for 2024
- In 2024, Best Pokemons for PVP Matches in Pokemon Go For Oppo Find X6 | Dr.fone
- [New] In 2024, Comprehensive Snapshot Tool - AZ Reviews & Substitutes
- New In 2024, Chromecast Compatibility Hack Stream Any Video Format with Ease
- Hard Resetting an Lava Blaze 2 5G Device Made Easy | Dr.fone
- [Updated] In 2024, Critical Analysis of the Best Free Video Chat Software Suitable for Businesses & Educators
- In 2024, How to Transfer Contacts from Infinix Smart 7 to Outlook | Dr.fone
- New In 2024, Final Cut Pro Aspect Ratio Settings A Beginners Guide
- Top 6 Apps/Services to Trace Any OnePlus Ace 2 Location By Mobile Number | Dr.fone
- [Updated] 2024 Approved ScoutingCameras More Than Just MyCam
- 2024 Approved Navigating Twitter's Promotional Features
- New KineMaster for Mac OS Download, Install, and Start Creating for 2024
- In 2024, How to Come up With the Best Pokemon Team On Samsung Galaxy S23+? | Dr.fone
- New 2024 Approved Major Update Alert Filmora X Now Compatible with ARM Processors
- Fix Unfortunately Settings Has Stopped on Itel S23+ Quickly | Dr.fone
- How to Rescue Lost Photos from Samsung Galaxy S23 FE?
- Updated In 2024, Movie Maker Replacements Explore These 10+ Options
- In 2024, How to Intercept Text Messages on Motorola Edge 40 Pro | Dr.fone
- How To Transfer WhatsApp From iPhone 12 Pro to other iPhone devices? | Dr.fone
- In 2024, How To Stream Anything From Oppo Reno 11 Pro 5G to Apple TV | Dr.fone
- [New] How to Choose Between Filmora and Democreator for 2024
- In 2024, Complete Tutorial to Use GPS Joystick to Fake GPS Location On Infinix Zero 5G 2023 Turbo | Dr.fone
- 2024 Approved PicturePeak Pro Best for Windows/Mac Image Snaps
- [Updated] 2024 Approved Decoding Why Your Facebook Messages Don't Share Videos (Android/iOS)
- [New] 2024 Approved Capture Your Skype Conversations on Any System
- In 2024, How to Track Oppo A78 by Phone Number | Dr.fone
- In 2024, How Can I Screen Mirroring Apple iPhone 11 Pro Max to TV/Laptop? | Dr.fone
- How to Change Lock Screen Wallpaper on Nokia 105 Classic
- [New] 2024 Approved Ideal No-Cost Screen Grabber Toolset
- [New] Transform Your Facebook Presence with These 11 Video Marketing Tips for 2024
- [New] Vidma's Innovation in Video Capture Space
- [Updated] FramingFraction Analysis
- In 2024, Best Top Vlog Editor Apps for iPhone and Android
- A Complete Guide To OEM Unlocking on Motorola Moto G04
- New Trim and Cut MKV Videos with These 10 Free Tools for 2024
- How to Unlock iPhone SE (2022) Without Passcode? | Dr.fone
- Title: "[Updated] In 2024, How to Produce Silent Soundtracks The Power of Audacity's De-Noising Tools"
- Author: Stephen
- Created at : 2024-05-23 03:56:03
- Updated at : 2024-05-24 03:56:03
- Link: https://tiktok-video-recordings.techidaily.com/updated-in-2024-how-to-produce-silent-soundtracks-the-power-of-audacitys-de-noising-tools/
- License: This work is licensed under CC BY-NC-SA 4.0.
