
![[Updated] In 2024, The Complete Visual Vocabulary of TikTok Emojis & Icons](https://www.lifewire.com/thmb/z3uV4BuNDzRDQ7ifJS6KaTNCHfs=/400x300/filters:no_upscale():max_bytes(150000):strip_icc()/001-how-to-fix-google-maps-not-working-4802364-966f13bdac7b41f9a9d357d428e168f8.jpg)
[Updated] In 2024, The Complete Visual Vocabulary of TikTok Emojis & Icons
The Complete Visual Vocabulary of TikTok Emojis & Icons
If you’ve just started using Tiktok, I’m sure you’re looking for ways to make your videos interesting so that more and more people view them. You look at videos with millions of views and wonder what it is that they are doing and you are not?
Well, let me tell you a secret!
While the content of the video is the most important thing when it comes to getting views, certain factors contribute to grabbing the attention of the audience. This includes the caption and the cover of your video.
So, if you’re out to make the next big viral video, you’ll need to work a bit on creating a compelling video with a nice caption and an attractive cover.
And that’s why we have compiled a complete guide for Tiktok elements!
Tiktok Videos
So, what is it that you need to make a successful Tiktok video? Let’s have a look:
1. Tiktok Video Requirements
The first and most important thing that you need to know and understand is the requirement of a Tiktok video. The aspect ratio, the dimension, the orientation, and of course, the length!
Aspect Ratio: The majority of the people use Tiktok on their smartphones, so the aspect ratio for a Tiktok video should be 9:16 or 1:1 if there are sidebars.
Dimension: The recommended dimension for a Tiktok video is 1080 x 1920.
Video Orientation: As mentioned earlier, users usually watch Tiktok videos on their smartphones, so a video with a vertical orientation is much easier to watch compared to a video in landscape mode for which one has to tilt their phones.
Video Length: Tiktok videos are usually 15 to 60 seconds long depending on the content, but my advice would be to keep them short, as people usually watch shorter videos till the end and might get bored if the video is too long.
Video File Size: The file size for iOS devices is 287.6 MB max, and for Android, it is 72 MB.
Supported Format: The video format compatible with Tiktok is MP4 and MOV.
If you keep these basic requirements in mind and make videos that fall within these criteria, I’m sure your videos will be watch-worthy. However, there are other elements to consider as well, like…
2. Best Practices to Make Successful Tiktok Videos
Tiktok video requirements will help you create videos with the perfect orientation, dimension, and aspect ratio. However, if you want to make videos that get millions of views, go viral, and increase your followers, you must know the best practices to make successful Tiktok videos.
For instance:
Post Frequently: If you want to appear on the FYP, you must post often! The more videos you post, the more the chances to come in front of the audience. And, when the audience sees you regularly, they will get acquainted and start following you to see more of your content.
Follow the Trends: Tiktok is all about trends. Something goes viral, and everyone starts making the same content to jump on the bandwagon. The trick is to make the same thing in a unique way. Therefore…
Be Authentic: The only way you can be unique is to be authentic, be you! If you keep your originality intact even when following the trend, chances are the audience might just click with your content.
Choose a Niche: While, Tiktok is known for having all sorts of video content, ranging from comedy, to sad, to just being motivational, you need to find something you’re good at. For instance, if you can sing well, you can post videos of you singing famous songs. Or, if you can paint well, you can post videos of you painting something. You will reach the right audience, and they will follow you!
If you ask me, I could watch ASMR cooking videos for hours!
3. Methods to Find a Viral Titok Topic
If you want your Tiktok video to go viral, you need to know what is getting viral currently. And for that, you’ll have to do some research.
Tiktok Search Bar: The best way to find a viral Tiktok topic is to visit the “Discover’’ page on Tiktok. Here you’ll get to see all the trending hashtags and sounds.

This also includes trending challenges. So, if you want to get noticed on Tiktok, use a viral sound or do a viral challenge!
4. Best Examples for Tiktok Videos
So, what kind of videos should you make to get to the top on Tiktok? Here are a few examples:
Challenges: One way to create a viral video is to go for social media challenges. People come up with challenge videos every now and then, and the whole world gets into the groove, like that ice bucket challenge from 2014 or the Cotton Eyed Joe challenge from 2021.
https://vm.tiktok.com/ZSeKavSXN/
Dance Videos: Social media challenges are one thing, but viral dance videos take the fun to the next level. So, if you think you can dance, and add a bit of creativity to it, make a dance challenge video. If you’re good at it, you’ll definitely gain some followers.
Lip Sync Videos: Another way to go viral on Tiktok is to make lip-sync videos. The trick is to see who can do it without messing up the lyrics. Like this viral song “Already Best Friends” by Sagittarius Kween:
https://vm.tiktok.com/ZSeKanPpe/
Art Videos: If you can make art, you can go viral in no time! Take out those paints, colors, and pens, and create a time-lapse painting! Something like this:
https://vm.tiktok.com/ZSeKab37F/
Satisfying ASMR Videos: Satisfying ASMR videos are getting increasingly popular. And, by getting a decent noise-canceling mic, you can easily create such videos and increase your followers.
Like this kinetic sand ASMR video:
https://vm.tiktok.com/ZSeKmhDyT/
Makeup Videos: Makeup tutorials are not only taking over Tiktok but they can be found on other social media platforms as well, with insane followers and subscribers! If you have the knack to create unique looks with makeup, try your hand at this!
https://vm.tiktok.com/ZSeKmxt1V/
These are just examples of the kind of videos that get viral on Tiktok. If you have skills similar to the videos mentioned above, or if you have any other skill for that matter, get on Tiktok, make a video, and get famous!
Tiktok Video Caption
Once you have created an engaging Tiktok video, the next part is to write an attractive caption for it.
1. Best Practices to Write Attractive Tiktok Captions
Here are some tips to help your videos go viral due to the captions:
Quotes: A caption can be any line that describes the video or a quote just to grab attention. You can use famous quotes or a dialogue that’s trending to make your caption attractive.
Hashtags: You can also use viral hashtags in your captions to make your video appear on the FYP or if someone searches for that particular hashtag. Another tip is to use generic hashtags alongside the viral ones, like #Art #Funny #Asmr, etc.
Mentions: Mentioning famous Tiktok accounts in your caption can also make people watch your video.
Emojis: Using emojis in the caption is a good idea to grab attention and make it worth reading.
We’re done with how to make watch-worthy Tiktok videos and add engaging captions. But did you know that the video cover also plays an essential role in getting more views?
Tiktok Video Cover
Like influencers use catchy thumbnails for their YouTube videos; similarly, TikTok videos also have video covers. So, what should one do to make an attractive TikTok cover?
1. Requirements for TikTok Video Cover
A thumbnail or video cover is a crucial deciding factor whether to click and watch a TikTok video or not. Therefore, when choosing a cover for your video, make sure it:
- Accurately portrays the content
- Creates excitement among the audience
- Catches their attention
If you succeed in doing these 3 things, the audience will be definitely compelled to click on your video!
2. Best Practices to Make an Attractive TikTok Cover
If you want to create an attractive TikTok video cover, here’s what you need to do:
Include Text: A title text on the video cover explains the exact purpose of your video. This helps people decide whether they want to consume the content or not.
For example, if I come across a TikTok video with the title text that says, “5 Tips To Make Your Cat Love You,” I would probably not click on it because I’m not a cat person. However, people with cats would waste no time watching the same video.
Additionally, a title text can also create a sense of curiosity for the audience and compels them to click and see what happens next. For instance, a TikTok video titled “I Almost Died!” will create suspense, and people will definitely want to know what happened.
Use a Good Font Style: I always recommend using a clear, bold font style as it is easy to read. If you use an excessively curvy style or one that does not have clear letters, the audience might have difficulty reading it on the first attempt.
Also, staying consistent with a specific font style for your thumbnails helps you stand out. People will start recognizing your videos even before looking at the name.
So, choose your font wisely!
Use Pleasant-Looking Contrast: Here, we are referring to the background color and the font color. Make sure they complement each other! If you’re using a light background, make sure the title text font is dark and vice versa.
Add Few Objects Only: Make sure your TikTok video cover does not have too many objects in it. Stick to a simple text, an image, and a background. Adding an image, bold font style, bright background, and throwing in a couple of stickers may give a cluttered look. The trick is to keep it simple and neat.
With that sorted, let me show a few examples of TikTok video covers that successfully do the trick!
3. Best Examples for TikTok Video Cover
Here are some of the best examples of compelling TikTok video covers:
- If you’re looking for quick ways to earn some bucks, a TikTok video cover like this one is undoubtedly going to catch your eye and attention!

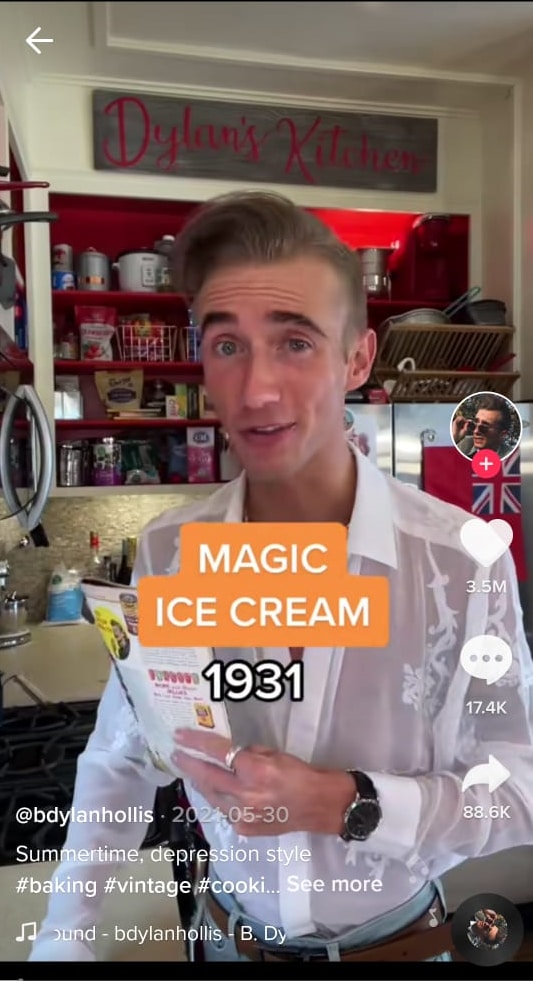
- Scrolling through cooking videos, you see this thumbnail for Magic Ice cream! I don’t know about you, but I sure want to know what this ice cream is all about!
- What’s this? What did they find out? Let’s watch the video and see!

- If you’re a mom, this thumbnail will definitely have you clicking the video!

- I don’t know if this tip will ever come in handy, but I’m very curious to know how this man survived a cougar!

See how these simple tricks help you create a compelling TikTok video cover?
Conclusion
If you’re using TikTok to market your products or services or to get fame, or just to jump on the bandwagon to go viral, then there are certain elements you need to consider for the best visual experience, like the content, caption, and thumbnail.
Once everything is on fleek, your TikTok video will definitely get more views. But, the key is to be consistent! It’s possible that you might not get the desired response in the initial few videos, but once you make it to the FYP and people start seeing you regularly, everything else will fall in place.
I hope this complete guide for TikTok elements will help you with your fame and success journey!
This also includes trending challenges. So, if you want to get noticed on Tiktok, use a viral sound or do a viral challenge!
4. Best Examples for Tiktok Videos
So, what kind of videos should you make to get to the top on Tiktok? Here are a few examples:
Challenges: One way to create a viral video is to go for social media challenges. People come up with challenge videos every now and then, and the whole world gets into the groove, like that ice bucket challenge from 2014 or the Cotton Eyed Joe challenge from 2021.
https://vm.tiktok.com/ZSeKavSXN/
Dance Videos: Social media challenges are one thing, but viral dance videos take the fun to the next level. So, if you think you can dance, and add a bit of creativity to it, make a dance challenge video. If you’re good at it, you’ll definitely gain some followers.
Lip Sync Videos: Another way to go viral on Tiktok is to make lip-sync videos. The trick is to see who can do it without messing up the lyrics. Like this viral song “Already Best Friends” by Sagittarius Kween:
https://vm.tiktok.com/ZSeKanPpe/
Art Videos: If you can make art, you can go viral in no time! Take out those paints, colors, and pens, and create a time-lapse painting! Something like this:
https://vm.tiktok.com/ZSeKab37F/
Satisfying ASMR Videos: Satisfying ASMR videos are getting increasingly popular. And, by getting a decent noise-canceling mic, you can easily create such videos and increase your followers.
Like this kinetic sand ASMR video:
https://vm.tiktok.com/ZSeKmhDyT/
Makeup Videos: Makeup tutorials are not only taking over Tiktok but they can be found on other social media platforms as well, with insane followers and subscribers! If you have the knack to create unique looks with makeup, try your hand at this!
https://vm.tiktok.com/ZSeKmxt1V/
These are just examples of the kind of videos that get viral on Tiktok. If you have skills similar to the videos mentioned above, or if you have any other skill for that matter, get on Tiktok, make a video, and get famous!
Tiktok Video Caption
Once you have created an engaging Tiktok video, the next part is to write an attractive caption for it.
1. Best Practices to Write Attractive Tiktok Captions
Here are some tips to help your videos go viral due to the captions:
Quotes: A caption can be any line that describes the video or a quote just to grab attention. You can use famous quotes or a dialogue that’s trending to make your caption attractive.
Hashtags: You can also use viral hashtags in your captions to make your video appear on the FYP or if someone searches for that particular hashtag. Another tip is to use generic hashtags alongside the viral ones, like #Art #Funny #Asmr, etc.
Mentions: Mentioning famous Tiktok accounts in your caption can also make people watch your video.
Emojis: Using emojis in the caption is a good idea to grab attention and make it worth reading.
We’re done with how to make watch-worthy Tiktok videos and add engaging captions. But did you know that the video cover also plays an essential role in getting more views?
Tiktok Video Cover
Like influencers use catchy thumbnails for their YouTube videos; similarly, TikTok videos also have video covers. So, what should one do to make an attractive TikTok cover?
1. Requirements for TikTok Video Cover
A thumbnail or video cover is a crucial deciding factor whether to click and watch a TikTok video or not. Therefore, when choosing a cover for your video, make sure it:
- Accurately portrays the content
- Creates excitement among the audience
- Catches their attention
If you succeed in doing these 3 things, the audience will be definitely compelled to click on your video!
2. Best Practices to Make an Attractive TikTok Cover
If you want to create an attractive TikTok video cover, here’s what you need to do:
Include Text: A title text on the video cover explains the exact purpose of your video. This helps people decide whether they want to consume the content or not.
For example, if I come across a TikTok video with the title text that says, “5 Tips To Make Your Cat Love You,” I would probably not click on it because I’m not a cat person. However, people with cats would waste no time watching the same video.
Additionally, a title text can also create a sense of curiosity for the audience and compels them to click and see what happens next. For instance, a TikTok video titled “I Almost Died!” will create suspense, and people will definitely want to know what happened.
Use a Good Font Style: I always recommend using a clear, bold font style as it is easy to read. If you use an excessively curvy style or one that does not have clear letters, the audience might have difficulty reading it on the first attempt.
Also, staying consistent with a specific font style for your thumbnails helps you stand out. People will start recognizing your videos even before looking at the name.
So, choose your font wisely!
Use Pleasant-Looking Contrast: Here, we are referring to the background color and the font color. Make sure they complement each other! If you’re using a light background, make sure the title text font is dark and vice versa.
Add Few Objects Only: Make sure your TikTok video cover does not have too many objects in it. Stick to a simple text, an image, and a background. Adding an image, bold font style, bright background, and throwing in a couple of stickers may give a cluttered look. The trick is to keep it simple and neat.
With that sorted, let me show a few examples of TikTok video covers that successfully do the trick!
3. Best Examples for TikTok Video Cover
Here are some of the best examples of compelling TikTok video covers:
- If you’re looking for quick ways to earn some bucks, a TikTok video cover like this one is undoubtedly going to catch your eye and attention!
- Scrolling through cooking videos, you see this thumbnail for Magic Ice cream! I don’t know about you, but I sure want to know what this ice cream is all about!
- What’s this? What did they find out? Let’s watch the video and see!
- If you’re a mom, this thumbnail will definitely have you clicking the video!
- I don’t know if this tip will ever come in handy, but I’m very curious to know how this man survived a cougar!
See how these simple tricks help you create a compelling TikTok video cover?
Conclusion
If you’re using TikTok to market your products or services or to get fame, or just to jump on the bandwagon to go viral, then there are certain elements you need to consider for the best visual experience, like the content, caption, and thumbnail.
Once everything is on fleek, your TikTok video will definitely get more views. But, the key is to be consistent! It’s possible that you might not get the desired response in the initial few videos, but once you make it to the FYP and people start seeing you regularly, everything else will fall in place.
I hope this complete guide for TikTok elements will help you with your fame and success journey!
Cutting Down Ambient Audio in Sound Editing
The most frequent request you’ll get from video makers is to eliminate irritating noises like rumbling or humming from an original clip. Almost all of the time, capturing high-quality audio during filming is challenging since the conversation is often hard to hear or is made unclear due to surrounding noises, such as the dreadful air conditioners or fans.
To get rid of all these awful noises, this Audacity Noise Reduction feature will serve you a significant purpose in removing unwanted background noise for your future videos. Without further ado, let’s get started!
In this article
01 Things You Need to Prepare for Background Noise Reduction
02 How to Remove Background Noise in Audacity?
03 Why is Audacity Noise Reduction Not Working?
04 How to Prevent Background Noise in Audio Recording?
05 How to Remove Background Noise in Filmora?
Part 1: Things You Need to Prepare for Background Noise Reduction
Here are few things that you need to consider before you apply the noise reduction to your clips:
1. Noise Sample
A decent sample of the noise you wish to eliminate is perhaps the most crucial aspect of the Audacity remove noise procedure.
This will be used by Audacity to understand the noise and build a noise profile. The noise recording should last for a fair amount of time and be devoid of any other noises.
2. Avoid Copy Pasting Tiny Noise Section in Your Spoken Phrases
When you have a tiny part of noise between your stated words on your audio, please don’t copy/paste it to make a more significant piece of sound for Audacity to examine.
You would not be supplying Audacity with any more information that will help it generate a decent noise profile. The noise profile is what enables Audacity to tell the difference between speech and noise.
3. Minimum 2048 Data Samples Required
To build a noise profile, the Noise Reduction function requires a minimum of 2048 sample data. An audio file with a sampling frequency of 44.1kHz is roughly five hundredths of a second.
Note that this is the minor sound level that Audacity needs to generate a noise profile; however, should you supply a larger sample of the noise, Audacity can typically perform a great job of producing a suitable noise profile. As a result, attempt to capture a few seconds of background noises wherever possible.
4. Establish Recording Level and Record “Silence”
Setting your audio volume and capturing some “quiet” prior to speaking is the best way to achieve this. Instead, when you’ve finished talking, keep your camera/recorder going for a few moments.
Don’t move or create any sounds while capturing the background noises, and keep an ear open for any other noises. You only need to capture the ambient noise for a few moments; two to five seconds will suffice.
Part 2: How to Remove Background Noise in Audacity on Windows and Mac?
Whether you are using Windows or macOS, we will show you a step-by-step process to achieve your results using both software in this part of Audacity remove background music guide.
Remove background noise in Audacity on Windows
Step 1: On your recording, select a few moments of sound. Any segment of noise that incorporates other noises should be avoided.

Step 2: From the Effect menu, select Noise Reduction.

Step 3: Select the Get Noise Profile option whenever the Noise Reduction effect screen appears.

Note: Choose whether to implement the noise removal to the entire waveforms or only a portion of it.
Step 4: To access the Noise Reduction effects window, go to Effects > Noise Reduction. Raise the level of noise reduction progressively while previewing the result.

Step 5: Head over to the File section to Export and Save the result. Audacity does not save sound clips when you select Save Project; instead, you must choose Export. Select the file type you want to store and the place wherever you can save it. Select Save after giving the File Name.

Remove background noise in Audacity on Mac
Step 1: Create a room tone-containing audio file. When you don’t have a separate track for room tone, use a recording with a few moments of quiet in it. Click-and-drag to select a segment with a few minutes of silence using the Selection Tool.

Step 2: Select Noise Reduction from the Effects tab. Select the Get Noise Profile tab in the new tab under Step 1. The screen will shut, and Audacity will take noise profile samples of the indicated area.

Step 3: Click-and-drag to select the whole file, which requires noise reduction with the Selection Tool. To re-open the function, go to the Effect tab and pick Noise Reduction. Make modifications to the following parameters under Step 2:
- Reduce and Residue
- Frequency Smoothing (bands)
- Sensitivity
- Noise Reduction

Step 4: To listen to how the chosen file will look with the selected parameters, select Preview. Re-adjust until you have a sound noise reduction with no interference. When you’re finished, select Reduce and click OK.
Part 3: Why is Audacity Noise Reduction Not Working?
It’s possible that the Noise Reduction function isn’t letting you mop up your recording since your audio isn’t appropriate for it. The disturbance must be continuous, not random or fluctuating, to work for Audacity’s Noise Reduction function.
For example, the Noise Reduction function will not assist if your audio was made in a busy environment with unique noises such as background chatter, random traffic noises, or in an exhibition space or museum. The Noise Reduction feature in Audacity isn’t meant to cope with that kind of distortion. You’ll need to alter your recording approach if you’re capturing voice in either of those situations.
Under the following situations, the Audacity Noise Reduction function might underperform.
- Particular noise in the background, including traffic or people.
- When the harmonics of the sound and voice are comparable.
- There is sound variance where there is fluctuation in the noise.
- The volume of the voice is comparable to or lower than that of the background noise.
- When the noise is irregular or changeable rather than continuous.
- The loudness is deafening.
- The sound is a single click or pop.
Part 4: How to Prevent Background Noise in Audio Recording?
Although Audacity allows eliminating noise very simply, it is still an additional level that takes time to refine your podcast production. These pointers can help you avoid the necessity for noise reduction and cut down on the amount of time you spend processing.
1. Reduce the Computer Fan Noise
Whenever computers become too heated, they can produce a lot of noise. You may limit the amount of software that runs and position your mic away from the keyboard to help lessen this impact and avoid the fan from coming on.
However, even if you observe all of these guidelines, undesired recording sounds may still appear in your program. Fortunately, contemporary software makes this problem quite simple to resolve.
2. Reduce the Gain and Get Close to the Mic
Reduce the gain (sensitivity of the microphone) and go nearer to it. Talking straight into the microphone won’t distort your audio if you reduce the gain, and that would assist your microphone in concentrating on scooping up your voice’s tone.
Bonus Tip: Set your recorder’s (or DAW’s) sensitivity such that your speech peaks between -12 and -10db.
3. Utilize a Versatile Microphone
Condenser and dynamic microphones are the two most common types of podcast microphones. Condenser microphones are significantly more sensitive instruments meant to take up average atmospheric noise, whereas dynamic microphones have a narrower frequency range, picking up fewer ambient noises.
4. Optimize Your Recording Environment
The most significant and most crucial aspect of your podcasts’ sound quality is where you capture it. To optimize your personal podcasting space, we recommend choosing a peaceful, compact area away from HVAC systems, vehicles, external hard drives, background sound, motors, and other distractions. You may also increase the tone of your room by using natural sound absorbents such as curtains, rugs, carpets, and sofas.
Part 5: How to Remove Background Noise in Filmora?
Although there is a lot of software available to eliminate ambient noise, we highly suggest Wondershare Filmora Video Editor to edit audio and video in one place.
In addition to the standard audio editing capabilities, the recently redesigned Filmora currently includes enhanced waveforms, volume Keyframing , peak metering, and audio transitions, giving you a better audio editing interface.
For Win 7 or later (64-bit)
For macOS 10.12 or later
Filmora Video Editor will quickly remove ambient sound from both sound/video. You may also remove the sound from the video with this simple video editor, use the Audio Equalizer or Audio Mixer functions to modify the audio further, and then Export and save the audio in an Mp3 file. Here are the detailed steps:
Step 1: In the Wondershare Filmora Timeline menu, Import your footage. Trim the footage after previewing it and deleting the sections you don’t want to retain.

Step 2: To eliminate the ambient noise immediately, double-click on the video file, and go to the Audio panel to select the Remove Background Noise option. You will find that the background noise is removed automatically.

Step 3: After checking the results, select Export to download the noise-reduced clip to your desktop or upload it immediately to YouTube or Vimeo.

Conclusion
Well, there you have it. In this Audacity Remove Background Noise guide, we have reviewed every possible method you can adopt to get rid of the unnecessary background noise in the Audacity. And if the desired results are still not achieved, we highly recommend using the Wondershare Filmora editing software. Not only will it help you remove the unwanted ambient noise, but it will also allow you to customize your audio or video file further.
02 How to Remove Background Noise in Audacity?
03 Why is Audacity Noise Reduction Not Working?
04 How to Prevent Background Noise in Audio Recording?
05 How to Remove Background Noise in Filmora?
Part 1: Things You Need to Prepare for Background Noise Reduction
Here are few things that you need to consider before you apply the noise reduction to your clips:
1. Noise Sample
A decent sample of the noise you wish to eliminate is perhaps the most crucial aspect of the Audacity remove noise procedure.
This will be used by Audacity to understand the noise and build a noise profile. The noise recording should last for a fair amount of time and be devoid of any other noises.
2. Avoid Copy Pasting Tiny Noise Section in Your Spoken Phrases
When you have a tiny part of noise between your stated words on your audio, please don’t copy/paste it to make a more significant piece of sound for Audacity to examine.
You would not be supplying Audacity with any more information that will help it generate a decent noise profile. The noise profile is what enables Audacity to tell the difference between speech and noise.
3. Minimum 2048 Data Samples Required
To build a noise profile, the Noise Reduction function requires a minimum of 2048 sample data. An audio file with a sampling frequency of 44.1kHz is roughly five hundredths of a second.
Note that this is the minor sound level that Audacity needs to generate a noise profile; however, should you supply a larger sample of the noise, Audacity can typically perform a great job of producing a suitable noise profile. As a result, attempt to capture a few seconds of background noises wherever possible.
4. Establish Recording Level and Record “Silence”
Setting your audio volume and capturing some “quiet” prior to speaking is the best way to achieve this. Instead, when you’ve finished talking, keep your camera/recorder going for a few moments.
Don’t move or create any sounds while capturing the background noises, and keep an ear open for any other noises. You only need to capture the ambient noise for a few moments; two to five seconds will suffice.
Part 2: How to Remove Background Noise in Audacity on Windows and Mac?
Whether you are using Windows or macOS, we will show you a step-by-step process to achieve your results using both software in this part of Audacity remove background music guide.
Remove background noise in Audacity on Windows
Step 1: On your recording, select a few moments of sound. Any segment of noise that incorporates other noises should be avoided.
Step 2: From the Effect menu, select Noise Reduction.
Step 3: Select the Get Noise Profile option whenever the Noise Reduction effect screen appears.
Note: Choose whether to implement the noise removal to the entire waveforms or only a portion of it.
Step 4: To access the Noise Reduction effects window, go to Effects > Noise Reduction. Raise the level of noise reduction progressively while previewing the result.
Step 5: Head over to the File section to Export and Save the result. Audacity does not save sound clips when you select Save Project; instead, you must choose Export. Select the file type you want to store and the place wherever you can save it. Select Save after giving the File Name.
Remove background noise in Audacity on Mac
Step 1: Create a room tone-containing audio file. When you don’t have a separate track for room tone, use a recording with a few moments of quiet in it. Click-and-drag to select a segment with a few minutes of silence using the Selection Tool.
Step 2: Select Noise Reduction from the Effects tab. Select the Get Noise Profile tab in the new tab under Step 1. The screen will shut, and Audacity will take noise profile samples of the indicated area.
Step 3: Click-and-drag to select the whole file, which requires noise reduction with the Selection Tool. To re-open the function, go to the Effect tab and pick Noise Reduction. Make modifications to the following parameters under Step 2:
- Reduce and Residue
- Frequency Smoothing (bands)
- Sensitivity
- Noise Reduction
Step 4: To listen to how the chosen file will look with the selected parameters, select Preview. Re-adjust until you have a sound noise reduction with no interference. When you’re finished, select Reduce and click OK.
Part 3: Why is Audacity Noise Reduction Not Working?
It’s possible that the Noise Reduction function isn’t letting you mop up your recording since your audio isn’t appropriate for it. The disturbance must be continuous, not random or fluctuating, to work for Audacity’s Noise Reduction function.
For example, the Noise Reduction function will not assist if your audio was made in a busy environment with unique noises such as background chatter, random traffic noises, or in an exhibition space or museum. The Noise Reduction feature in Audacity isn’t meant to cope with that kind of distortion. You’ll need to alter your recording approach if you’re capturing voice in either of those situations.
Under the following situations, the Audacity Noise Reduction function might underperform.
- Particular noise in the background, including traffic or people.
- When the harmonics of the sound and voice are comparable.
- There is sound variance where there is fluctuation in the noise.
- The volume of the voice is comparable to or lower than that of the background noise.
- When the noise is irregular or changeable rather than continuous.
- The loudness is deafening.
- The sound is a single click or pop.
Part 4: How to Prevent Background Noise in Audio Recording?
Although Audacity allows eliminating noise very simply, it is still an additional level that takes time to refine your podcast production. These pointers can help you avoid the necessity for noise reduction and cut down on the amount of time you spend processing.
1. Reduce the Computer Fan Noise
Whenever computers become too heated, they can produce a lot of noise. You may limit the amount of software that runs and position your mic away from the keyboard to help lessen this impact and avoid the fan from coming on.
However, even if you observe all of these guidelines, undesired recording sounds may still appear in your program. Fortunately, contemporary software makes this problem quite simple to resolve.
2. Reduce the Gain and Get Close to the Mic
Reduce the gain (sensitivity of the microphone) and go nearer to it. Talking straight into the microphone won’t distort your audio if you reduce the gain, and that would assist your microphone in concentrating on scooping up your voice’s tone.
Bonus Tip: Set your recorder’s (or DAW’s) sensitivity such that your speech peaks between -12 and -10db.
3. Utilize a Versatile Microphone
Condenser and dynamic microphones are the two most common types of podcast microphones. Condenser microphones are significantly more sensitive instruments meant to take up average atmospheric noise, whereas dynamic microphones have a narrower frequency range, picking up fewer ambient noises.
4. Optimize Your Recording Environment
The most significant and most crucial aspect of your podcasts’ sound quality is where you capture it. To optimize your personal podcasting space, we recommend choosing a peaceful, compact area away from HVAC systems, vehicles, external hard drives, background sound, motors, and other distractions. You may also increase the tone of your room by using natural sound absorbents such as curtains, rugs, carpets, and sofas.
Part 5: How to Remove Background Noise in Filmora?
Although there is a lot of software available to eliminate ambient noise, we highly suggest Wondershare Filmora Video Editor to edit audio and video in one place.
In addition to the standard audio editing capabilities, the recently redesigned Filmora currently includes enhanced waveforms, volume Keyframing , peak metering, and audio transitions, giving you a better audio editing interface.
For Win 7 or later (64-bit)
For macOS 10.12 or later
Filmora Video Editor will quickly remove ambient sound from both sound/video. You may also remove the sound from the video with this simple video editor, use the Audio Equalizer or Audio Mixer functions to modify the audio further, and then Export and save the audio in an Mp3 file. Here are the detailed steps:
Step 1: In the Wondershare Filmora Timeline menu, Import your footage. Trim the footage after previewing it and deleting the sections you don’t want to retain.
Step 2: To eliminate the ambient noise immediately, double-click on the video file, and go to the Audio panel to select the Remove Background Noise option. You will find that the background noise is removed automatically.
Step 3: After checking the results, select Export to download the noise-reduced clip to your desktop or upload it immediately to YouTube or Vimeo.
Conclusion
Well, there you have it. In this Audacity Remove Background Noise guide, we have reviewed every possible method you can adopt to get rid of the unnecessary background noise in the Audacity. And if the desired results are still not achieved, we highly recommend using the Wondershare Filmora editing software. Not only will it help you remove the unwanted ambient noise, but it will also allow you to customize your audio or video file further.
Also read:
- The Ultimate Guide to Desktop-Based TikTok Videos for 2024
- [Updated] Captivate, Convince, and Connect Explore the Top 20 TikTok Caption Tricks
- Iconic PFP Ideas Make a Mark in the World of TikTok for 2024
- Transforming TikTok to Pop with Top GIF Tools for 2024
- [New] Discover Amazon's Best The Hottest TikTok Items You Must Know for 2024
- [New] Your Must-Listen TikTok Rap Playlist
- [Updated] 2024 Approved Elevate Visual Narratives on TikTok The Top 5 Proven Text Techniques
- [New] 2024 Approved Leaders in Earnings Prediction TikTok's Finest Tools
- [New] Unlock Visual Wonders The Hottest TikTok Filters Compilation for 2024
- [Updated] 2024 Approved Commanding Attention Top 20 Creative TikTok Captions
- [Updated] 30 Hot TikTok Amazon Finds You Must Know
- 2024 Approved Elevate to a Custom Hashtag Mastery on TikTok
- [New] 2024 Approved Expertly Calculated Earnings TikTok's Finest Tools
- [Updated] 2024 Approved Elevating Your Presence on TikTok Essential 7 Must-Haves
- [New] 2024 Approved Revolutionize Your Social Media Game with Top 20 TikTok Caption Strategies
- [New] Commanding Attention Top 20 Creative TikTok Captions
- [Updated] Weekly Hits Can't Skip These TikTok Tests
- The Social Media Face-Off Is the Future of Sharing with Likes, Not TikTok?
- [New] Elevate Your Broadcast Game 4 Innovative Methods From Desktop Users on TikTok
- Top 3 Ways to Create Big Head Effects for a Striking TikTok Video
- 2024 Approved Cutting Edge TikTok Content Mastering Video Edits on Mac
- [New] A New Era for TikTok Profiles Top 30 Innovative PFP Concepts for 2024
- 2024 Approved Crafted Connections Social Media's Role in Textile Techniques
- [New] 2024 Approved Trending Apps Battle Royale Who'll Win Over Users, Likes or TikTok?
- In 2024, Top TikTok Patterns You Can’t Miss This Year
- TikTok Glitches Troubleshooting iOS/Android Issues for 2024
- 2024 Approved Sketching Your Signature TikTok End-Note
- [New] Permanent TikTok Account Elimination Guide
- [New] Premium Income Analysis Tools for TikTok Talent
- [New] In 2024, Sonic Sanitation Purifying Recordings in Audacity
- [Updated] 2024 Approved Ethical TikTok Following Purchase with Peace of Mind
- Ranking the Best TikTok Profit Estimators for 2024
- [New] TOP 10 Boosting TikTok Success with Key Analytics for 2024
- Trending TikTok Laughter Stars and Sensations
- In 2024, Navigating the Best TikTok to GIF Conversion Applications
- The Blueprint for Creating Stellar TikTok Promotional Content for 2024
- 2024 Approved Authenticity-Focused TikTok Followers Buying Guide
- [Updated] 2024 Approved Mastering Movies The Best of Viral TikTok Creations (Top 10)
- [Updated] In 2024, Trailblazing PFP Concepts to Secure Your Spotlight on TikTok
- 2024 Approved Downloading Dynamite - A TikTok Hustle Manual
- [New] In 2024, Spotlight on TikTok's Newest Dance Moves
- [Updated] Rhythmic Rollercoaster Jumping on the Wave of Top Rapping Songs
- 2024 Approved Who's Leading the Charge in TikTok Gaming?
- [New] Purify Videos Premium Mark-Removal Apps iOS/Android
- [Updated] 2024 Approved Baffling Battles A Collection of Intense TikTok Games
- [Updated] In 2024, Dramatic TikTok PFP Ideas Elevate Your Profile Game
- Change Location on Yik Yak For your Motorola Moto G14 to Enjoy More Fun | Dr.fone
- [New] Mastering Screencast Technology with ITop Review
- A Complete Guide To OEM Unlocking on Vivo S18
- A Quick Guide to Tecno Spark 20 Pro+ FRP Bypass Instantly
- Updated In 2024, Enhance Business Efficiency Mastering Call Tracking with Google Voice Services
- How to Factory Reset Xiaomi Redmi K70 Pro If I Forgot Security Code or Password? | Dr.fone
- Unlock android phone if you forget the Motorola Edge 2023 password or pattern lock
- [Updated] In 2024, Revamping Screens Recording The Future on Spring
- Updated Troubleshooting FCPX A Step-by-Step Reset Guide for 2024
- Best Practices for Exporting Audacity Sessions as MP3 Files
- The Top 5 Android Apps That Use Fingerprint Sensor to Lock Your Apps On Tecno Spark Go (2023)
- 2024 Approved ScreenRecorder Ultimate Clear Viewing Tool
- In 2024, How To Remove Passcode From iPhone 15 Pro? Complete Guide
- Title: [Updated] In 2024, The Complete Visual Vocabulary of TikTok Emojis & Icons
- Author: Stephen
- Created at : 2024-05-23 04:17:51
- Updated at : 2024-05-24 04:17:51
- Link: https://tiktok-video-recordings.techidaily.com/updated-in-2024-the-complete-visual-vocabulary-of-tiktok-emojis-and-icons/
- License: This work is licensed under CC BY-NC-SA 4.0.
